
I haven’t been writing much lately so it is time to get a few out of the way. Some weeks ago, I was asked about an Asus Taichi 21 Notebook that had suddenly stopped working. The notebook is one that has a dual screen, open up normally as a notebook, close the lid and the back screen comes up as a tablet. Neither screen was operating and it had been sent to Asus to look at. I suggested that I should be able to get his data off the notebook as Asus would not provide this service. Eventually a quotation was received which was quite high – you could buy a second hand Asus Taichi 21 on eBay for much less than the quote, so eventually it came to me to look at and get some very important files from it.
On inspection, the notebook as an internal SSD which at first glance looks like a normal mSata or M.2 SSD however on closer inspection – it is quite different. Further research indicated that there were adapters available that would convert this SSD to standard Sata – and I was fortunate enough to find a local Sydney supplier that had one of these in stock for $20 or so. I ordered one, and when it was ready – went for a short drive to pick it up. Now the adapter looked like it wasn’t the right one, but they assured me that it would work. The socket is much larger and is not quite the same as the socket on the motherboard, so after some further research, I decided that it should work. Of course, this can be a risk that could destroy much wanted data – but there were no indications on the internet that these adapters posed a problem.
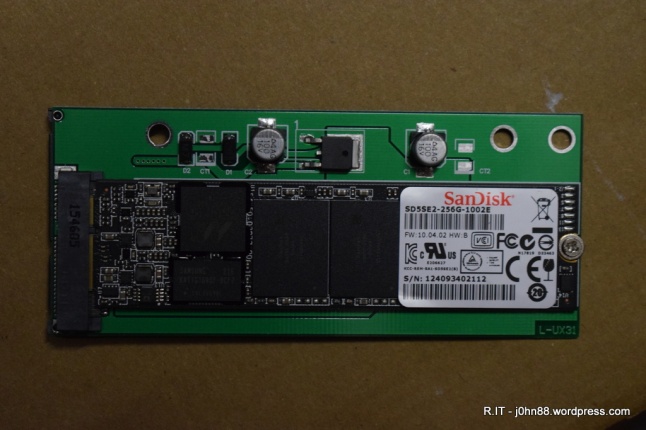
This shows the adapter with the SSD installed. Note the size of the socket. This adapter is used for the Asus Taichi and UX21/31 notebooks. See below, for a photo of the motherboard with its socket.
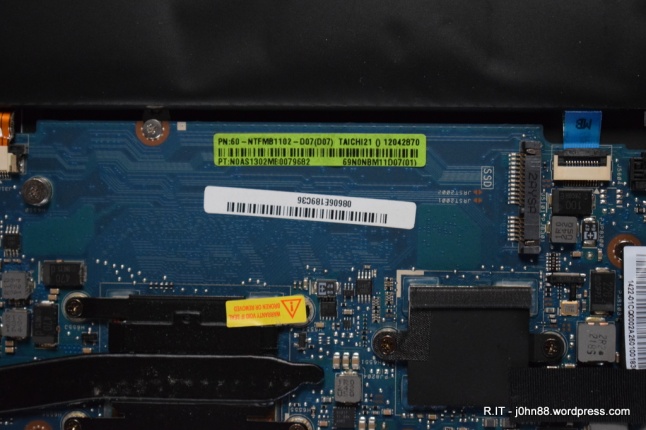
You can clearly see the difference as the motherboard socket has 6 and 12 pins, but the adapter socket has many more pins. Anyway, I connected the adapter to my recovery machine, and it was recognized by the Bios and by my Ubuntu operating system. I went to mount the disk, but it complained that the partition had not been cleanly dismounted.
No real problem, the way to get around this is to mount it as read-only which will ignore the dirty bits as I only want to copy data from it. After doing an “fdisk -l” to list the partitions, I eventually used the “mount -t ntfs -o ro” command to mount the partition and then was able to copy the required data to any external usb disk. The D: drive folders and contents which is what I copied – as this was what was required.
After that, I reassembled the notebook and that was that, or was it? A quick search of the internet showed that the motherboard “60-NTFMB1102-D07” was available for a few hundred dollars which would likely fix the notebook, but that is another story.
