
Happy New Year! to all readers. This Christmas and New Year period has been very hot in the Sydney area, so what resolutions have you made this time? One of mine was not to leave things too long that need repairing, and also to write about it, if it is worth writing about – not to leave that too long either. I remember a saying that if you thought of something (or an idea) and didn’t write it down, it is as if you had never thought of it. How many times has someone come up with a new product or service, and you said “I thought of that a long time ago!”
To come to today’s subject, is not really IT related but here goes. We have a built-in wardrobe in our main bedroom where the doors would not shut properly, would blow open on a whim – you know the ones, you close one door and another one opens. I had already repaired one door a year ago (or was it two) by replacing the hinge. At the time, I had noticed that the wooden frame to which the hinge attached, had a crack in it.
After a number of windy (read “stormy”) days recently, this particularly door was blown open which was causing the crack to get larger. I could wait until the door fell off, but that would be a bigger job to fix. Also my dear wife had something to say about that the night before, however on New Year day, I decided to remove both doors attached to that frame to fix the crack.
I did this by using a small screwdriver to open up the crack, then squeezed PVA glue into the crack and helped it by using a knife to coat the glue onto the inside surfaces. Once that was done, I used a number of clamps to close the crack and left it to set overnight. Of course, I did have to use a soft cloth and wipe up the excess glue that squeezed out.
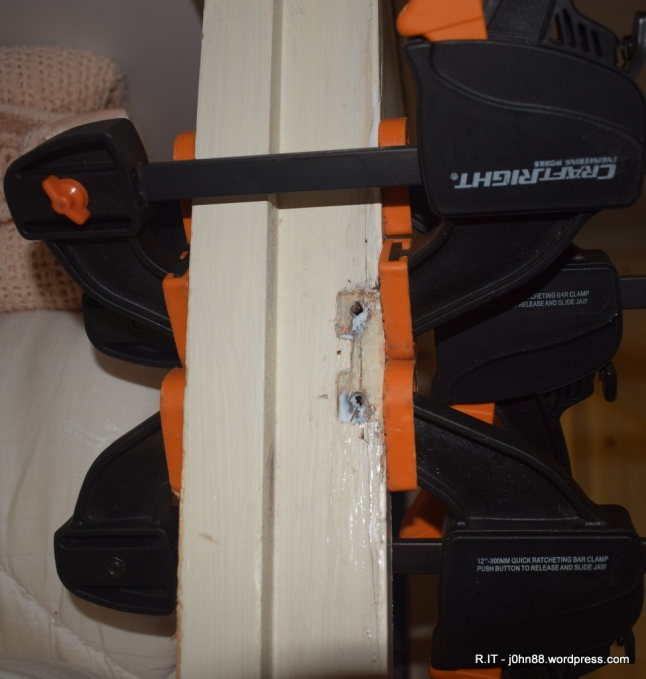
You can see from the photo above that it is quite a long crack. So what does this have to do with IT or recycling – it does have repair though, but here it comes.
While removing the door on the side that the photo shows, I noticed that each hinge was held by two bolts with a nut on the other side, which had embedded into the wooden frame by tightening each time the previous owner noticed that the door was loose. The wood is quite soft, so I can’t keep doing this so decided to come up with a proper solution.
After scratching my head a little bit, I came up with an idea – I needed something with a screw thread, like a nut but with a flange on the other side, that would not dig into the frame like the nut did. I quickly did a few measurements and drew up something on a small piece of paper. The original screws were 3/16″, but I decided to use M4 screws since I had almost a box full of M4 x 25mm stainless steel countersunk screws left over from another repair.
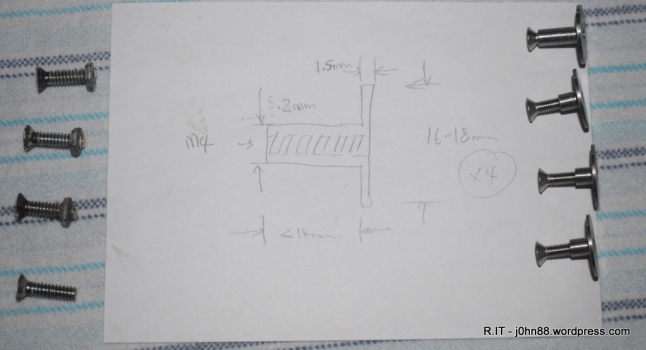
As the photo shows, a metric 4mm internal thread, so making the outside about 5.2mm diameter would give a wall thickness of 0.6mm which should quite sufficient. The flange could be about 18mm in diameter with a thickness similar to the hinge on the other side, so about 1.5mm. So this is where my metal working equipment came into play.
I had some 20mm mild steel bar left over from another repair job – almost 2m of it, so cut off about 12cm with a hacksaw. I could have used the bandsaw, and on hindsight should have, but what are muscles for if you used them from time to time. The inside bore of my lathe is 20mm so this means that I could put longer pieces into the lathe chuck, but cutting a smaller piece means that the lathe has less work to do.
I made the first part with about 1cm of thread – cutting metal can be fun, but since my lathe is a small one, I had to take a number of small cuts – like 0.5mm at a time. I see some Youtuber’s taking 2-3mm cuts of steel at a time, but that would be using a more powerful or larger lathe. Some of you may be wondering about the process of doing this?
- Mount the mild steel bar in the lathe chuck, enough for the machining needs – around 2cm.
- Take 1mm or so off the bar diameter, for the total length of the part, plus 3mm for the parting off and a bit more. This meant about 18mm.
- Spot drill the center hole with a center drill first, then with a 3.3mm drillbit to full depth. For the next piece, I won’t need the center drill which is used to start the hole.
- Turn off the lathe (and unplug the power) and attach my homemade hand crank/turner for the spindle, to tap the M4 thread by hand. Using some cutting fluid /lubricant on the tap, use the starter/taper tap, then the intermediate tap, and finally the bottoming/plug tap. Remove the spindle crank.
- Power up again, and turn the shaft to the right length and diameter of about 5.2mm – I made the first one 10mm long, but decided to do the remaining pieces shorter – around 5-6mm, less work involved.
- Use a parting tool to cut the piece off the bar leaving a flange of about 1.5mm thick. When it is almost cut through, I used a plastic pipe held next to the parting tool so that the part falls inside when it gets cut through. This avoids the part spinning around at 900 rpm falling and running off somewhere off the lathe.
- Repeat the process another three times.
My wife asked – couldn’t I have just gone out and bought something like this? Yes, if I knew who might have it but on January 1, 2019 – Bunnings was open, but I had the tools and the material. How much was this worth? I used about $3000 of equipment to make these four parts. When getting into metal turning and milling, it doesn’t look expensive, but once you get a few upgrades like quick change tool post, 12mm turning tool sets, etc – it all adds up.
As an example, the parting tool, is from Hare & Forbes, and buying one now as a kit would be https://www.machineryhouse.com.au/L464 for $198. The quick change tool post that I have is https://www.machineryhouse.com.au/L280 – another $198.
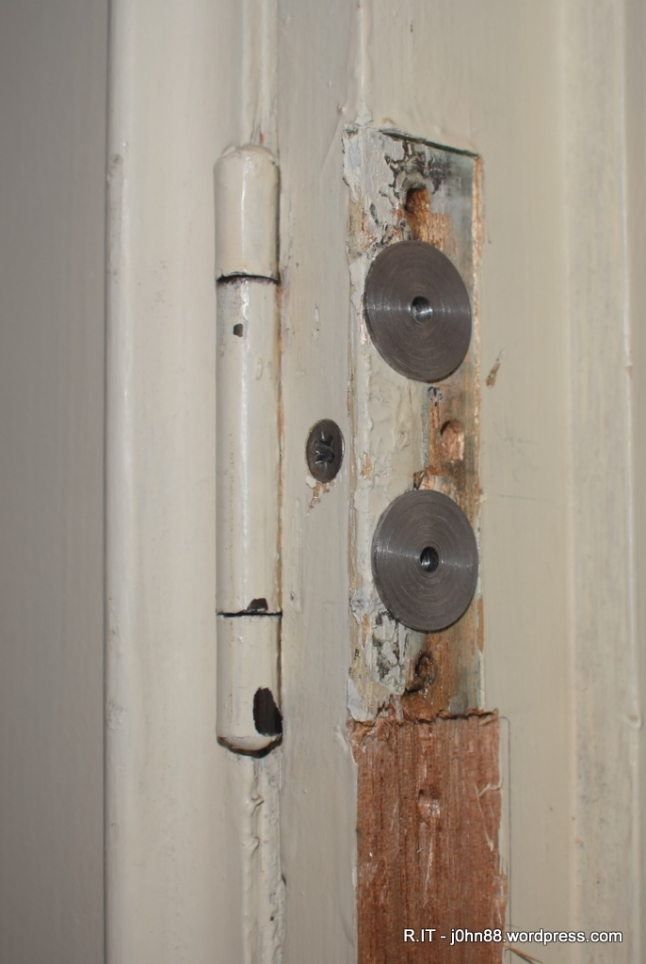
Once the glue was set, I used a 50mm long wood screw, after drilling a pilot hole, to screw into the frame – this should help keep the crack from opening up again, since just relying on the glue is not a good idea. Then it was a matter of cutting the M4 screws to be a little shorter, like 17mm in length overall – then placing the wardrobe door on some spacers to get the height correct – then fastening it.
The photo shows where the old hinge on the next door was replaced with a proper door hinge a bit lower down – that door was next on the list to remount.
Some of you might comment on the finish of the part – I can see turning marks/grooves on the part. This is due to the material of the mild steel bar that I used. It is not a free machining steel, so it doesn’t cut cleaning in the lathe – it feels a little gummy. But then carbide tools are not very sharp, so using high speed steel cutting tools should improve the finish – but nobody is really going to look at it since it spends most of its time covered by the doors – so here this is, my first repair job of 2019.
I did actually work on a second repair, but that one was machining a piece of nylon with a 4.5mm spigot sticking out and then riveting it to a piece of plastic that is part of a paper towel holder but I didn’t take any photos of it.
