Rebuild.IT – Data Recovery machine

In a previous article – Repurpose.IT – Norco SS-500 from data recovery machine to Truenas Scale storage server – I had swapped the motherboard in my data recovery machine so that the case with the Norco SS-500 could be repurposed to become a Truenas server. I also removed the Silverstone FS202B from that case, so will reuse it in my rebuilt Data Recovery machine.

The motherboard will stay the same – being the MSI B450-A PRO MAX together with its AMD Ryzen 5 3400G cpu and the 16GB of memory. I had another Coolermaster case on hand, so decided to use this together with a Corsair CS750M power supply. I didn’t need to use a 750W power supply, but I had this available. The Silverstone FS202B went into the case to be wired to the Sata1 & Sata2 ports.

This motherboard has a single M.2 slot that can handle NVMe or Sata SSD’s.

The important thing to note in this situation is that if I use an M.2 device, then I lose Sata5 & Sata6. I will have to remember this in future. The M.2 slot will handle both NVMe and Sata devices. I won’t need to use the M.2 slot for Sata devices, as I had bought a couple of M.2 to 2.5″ Sata adapters in 2021. This was the M.2 SSD NGFF (B Key) to 2.5″ SATA 7mm HDD Enclosure Case Converter Adapter and surprisingly, the price hasn’t changed from what I paid. I put my M.2 Sata SSD into one of these and just use one of the 2.5″ bays on the FS202B.

If I want to do copying of NVMe to NVMe, then I will have to use the onboard M.2 slot together with a Orico M.2 NVMe to PCIe 3.0 X16 Expansion Card that I bought for $16 late last year.

Two of the Sata ports are used, so now I need to get drive bays to fit four 3.5″ Sata disks. I could go for a SilverStone FS304-12G 4-Bay Triple 5.25″ Cage for 3.5″ SAS/SATA HDDs which is $179.95 from Mwave. The advantage of this cage is that it is trayless, so the disk drive just slides in and close the door – no more playing around with a screwdrive any time I want to swap a disk.

I decided to go for a SilverStone FS303-12G 3-Bay Double 5.25″ Cage for 3.5″ SAS/SATA HDDs which is $129.95 and has 3 bays in a double 5.25″ cage. Then to have the extra drive, I got this Simplecom SC314 5.25″ Bay Rack to 3.5″ SATA HDD Internal Enclosure for $16.95. Total cost is $146.90. I used a similar enclosure in my desktop gaming machine, so thought it would be suitable. If I needed in the future to expand my 3.5″ drives, then I could replace the Simplecom with another Silverstone 3-bay.

I had to wait nearly two weeks before the Silverstone FS303-12G was available for pickup as it had to be ordered in. Then part of a weekend was spent rebuilding my Data Recovery machine. The rebuild was completed and it was time to test it. On hindsight, maybe I shouldn’t have used the Simplecom SC314 as it doesn’t have any indicators on it to show that it’s is actively being accessed.

I should have used the Orico 1106SS-BK CD-ROM Space 3.5″ SATA HDD Mobile Rack that I had used in my gaming machine. It was just a little more expensive at $18 (down from $18.18 when I bought it last) as it would have been better to have the indicators. Maybe in the future, I might swap them over.

Here is the machine now – working away, copying a disk from the Simplecom to the middle slot of the 3-bay. The connections to the motherboard are as follows:

The 2.5″ FS202B has the top slot connected to Sata2 and the bottom slot to Sata1. Next, the Simplecom is connected to Sata3. Then Sata4, Sata5 & Sata6 in upwards order on the FS303. This makes it easy to remember, that the disk slots are in order from bottom to top.

Another Rebuild.IT article completed. Now that I think about it, I should have a raid rebuild article coming up – more on that later. I also found my notebook which contained details that I had written about in Restore.IT, Recover.IT – 2006 – When Murphy’s Law just wasn’t funny anymore! Or pages from the diary of a high-flying IT consultant and troubleshooter!

Review.IT – Hardware for a data recovery machine in the home lab

As some of you may remember, I have written about data recovery tasks in previous posts. In this post, I want to talk about the hardware that I have used, and mention some limitations when choosing and using particular hardware. Actually, the basic requirements of a data recovery machine for the home lab are similar to those requirements of a standard PC. It doesn’t need to be a very powerful gaming PC – just needs to be able to connect disk drives of all sorts, and have storage capacity – but we will go through this.

So what can we do with this data recovery machine in the home lab? We should establish this so that we can adjust our requirements. Typically, we would be dealing with recovering data from a disk or data storage device, that has either suffered from a virus corruption, possible logical issues like reformatting and/or the usual thing that has happened after an update has gone wrong, and the disk no longer boots. We won’t necessarily be involved with the physical or electronic repair of a spinning disk drive that involves removing platters, replacing heads, or head amplifiers – but we may deal with a disk that has some unreadable sectors. Now that we know what this machine will be used for, then we look at the requirements.

The CPU – this is the heart of the machine. Any recent CPU can be used – it could be from Intel or AMD. Although not absolutely essential, I recommend that the CPU have internal graphics. I am currently using an AMD Ryzen 5 3400G, but have successfully used an AMD Athlon II X3 420e for many years, then later, an Intel Pentium G4560. The old Athlon II X3 420e didn’t have internal graphics though, so it was paired with a low end video card. I preferred at that time to use a fan-less video card, since the graphics requirements are quite low, and being fan-less would mean that it uses less power and generates less noise, especially if the machine is running for many hours (days) at a time.

The Motherboard – this is the body of the machine, where all the peripherals connects to. Ideally, we should be able to install at least 8GB of ram, and preferably 16GB – my Ryzen has 16GB. It should have a number of Sata ports – depending on how many disk drives we want to connect at the same time. It could also have onboard M.2 sockets – one or two – but this is also not critical as we can get away with using adapters – which I will mention later. There should be a number of USB ports, but most of the recent motherboards already have these anyway.

The Case – this is the box that everything will be installed in. I would suggest something like a mid-tower case with a number of 5.25″ front bays. Any power supply should be sufficient as long as you have enough Molex or Sata power connectors to suit the number of drives you want to run at the same time.

Ok – that’s it, or is it? I didn’t mention IDE disks, did I? No, but that is because only the very old PC’s use IDE disk drives. We can cater for these by using external disk cases, that can take an IDE disk, and plug into a USB port, or even a Firewire port.

Now we look at some limitations of the motherboards and how I overcame them. The motherboard might have M.2 and Sata ports. One great example is the MSI Z270 Krait Gaming that I had paired with an Intel Pentium G4560. It had internal graphics which was great. It also had two M.2 slots that were NVMe compatible – which was really handy when I was copying and extending a NVMe disk for my brother’s Lenovo laptop.

One of the problems with using M.2 slots is that they do take away from your Sata ports depending on what you install into the M.2 slots. Here is a clip from the Krait Gaming manual.

From the table, we can see that installing a Sata device into M2_1 would disable Sata1 and installing a Sata device into M2_2 would disable Sata5, but then installing two NVMe devices into the M.2 slots would disable Sata5 and Sata6. Effectively this means that using one Sata M.2 device will limit your Sata ports to 5 in total – which in reality is quite reasonable. So I had used a 240GB M.2 Sata SSD into port M2_2 with that motherboard and was still able to use 5 Sata ports.

One thing I should note, is that the motherboard sata ports are not meant to be plugged and unplugged a lot. In fact most of the manufacturer specifications for the Sata socket itself say that its durability is quite low at max. mating cycles = 50. I got around this limitation by using a hot-swap Sata disk chassis. There are quite a few of these around, but the one I am using, was bought many years ago. It was a Norco SS-500 5 Bay Sata/SAS Hot Swap Rack Module.

This is a picture of what the Norco SS-500 looks like – but it is actually installed with the trays in the vertical position

This rack module comes with trays that will accept either 3.5″ Sata disks or 2.5″ Sata disks. It is powered by two Molex connectors. The rack module will use up 3x 5.25″ external case bays – one of the reasons why I suggested a mid-tower case. One of my initial problems encountered with this rack module, was that my case had bay guides and my rack module didn’t like that, so I had to bend the thin metal guides out of the way so that I could install the rack module. An alternative would be the Norco SS-400, which is 4 bays, but allows it to install into cases where the bay guides cannot be bent out of the way.

This Norco SS-400 would then fit most of the cases with bay guides and uses up three 5.25″ front bay slots

The case I used is quite an old one. It was a Cooler Master 334U and looks like this.

My Norco SS-500 was installed in the top three 5.25″ bays. The case could handle a full size ATX motherboard so was fully compatible. With the MSI Z270 Krait Gaming, I could have an internal M.2 SSD and be able to connect to five sata disks. Each Sata disk would be installed into a tray, then I would install each tray as needed. I might have a scratch disk, i.e. a disk that can be written to for either taking an image or for temporary usage. I could have a bulk storage disk, like a 4-8TB disk to keep disk images on and other disks if I want to do disk-to-disk copying/imaging.

Earlier this year, I decided to upgrade my CPU/Motherboard combination to make my data recovery machine into a more general purpose machine. I bought an AMD Ryzen 5 3400G cpu that has integrated graphics (Radeon Vega 11) and paired it with a MSI B450-A PRO MAX motherboard. The motherboard comes with 6x Sata ports and 1x M.2 slot. Unfortunately when the M.2 slot is used, it disables Sata5 and Sata6. Then I was limited to 4 Sata ports if I used my M.2 slot.

To fix this, I decided to do two things. I would get from ebay, a couple of disk adapters, those that take a M.2 device and convert it to a 2.5″ Sata disk. Then in addition, I would get a Silverstone FS202B 3.5″ to 2.5″ Hot Swap Drive Bay.

The Silverstone FS202B takes two 2.5″ Sata drives – I only needed one, but the second might be handy in the future

The Silverstone FS202B could then be installed into one of the front 3.5″ bays, and give me access to the full six Sata slots. It has a trayless design, and can handle two 2.5″ disks, but I would only use one for the time being. I can use this in conjunction with the M.2 to Sata adapters for booting my operating system that I will mention in a later post.

An alternative to the Norco SS-500 in a trayless design would be the Icy Box IB-565SSK. The Icy Box will only take 3.5″ drives, so to use a 2.5″ would require a 2.5″ to 3.5″ bay converter or caddy. However, in the future, I might move towards getting a rack module that is trayless like the Norco SS-400 which gives me 4x 3.5″ slots, then will be able to use both of the FS202B 2.5″ drive slots. If I ever need to connect more than two 2.5″ drives, I can then use a converter.

Newer case styles have moved towards reducing the number of front 5.25″ bays. Many of the lower cost cases have only two bays, so a suitable alternative is something like the StarTech 3-Bay Hot Swap Backplane that fits into two bays. To get more front bays, you will need to look at larger and more expensive cases.

I haven’t mentioned a hardware write blocker. This data recovery machine is for a home lab, but depending on your budget, you can get a write blocker. Usually a write blocker is a USB connected device that allows connection of Sata/SAS disks or even IDE disks such that any writes to the disk are disabled/blocked. We would definitely use a write blocker if we wanted to make a proper forensic image that is needed for legal reasons.

For a home lab, a hardware write blocker is not necessary – but if what we were doing is needed in court, then a write blocker is a must – along with proper chain of evidence documentation. If you wish to get a write blocker, you should use one that is approved and tested.

So that is almost it – oh, one more thing, you can also get an Orico 1106SS that is a 5.25″ to 3.5″ Sata Hot Swap Rack – also trayless, allows you to use a spare 5.25″ front bay. There are also modules that convert mSata to Sata. It all depends on what devices you want to read or recover from. The options for the drive configurations are numerous. If you are mainly working on laptop data recovery, then you need fewer 3.5″ slots. The bare minimum would be three – an operating system drive, the source disk, and the target disk. Once the imaging has been done, swap out the source disk and put it away, since all work will be done on the target disk, or a scratch disk that is inserted afterwards.

Anyway, I hope you enjoyed this post – that discusses some of the requirements of a data recovery machine, which basically summarizes down to how many concurrent disk devices you want to use. You can make do with less, but that means moving data around. One thing I didn’t mention was network storage – instead of copying disk images to another disk, you could use network storage – I do have that as well, but found network storage to be a lot slower than physical disk to disk. If I want to make an image of a 2TB disk, then I need to be able to store that 2TB disk image somewhere, and usually is to a bulk storage disk like a 4TB or larger disk. Once I have the disk image, then I like to copy the image back to a physical disk after removing the original source disk, so it helps to have a number of scratch disks available whose contents you don’t care about, once the job is done.

Recover.IT – Asus Taichi 21 Notebook

I haven’t been writing much lately so it is time to get a few out of the way.  Some weeks ago, I was asked about an Asus Taichi 21 Notebook that had suddenly stopped working.  The notebook is one that has a dual screen, open up normally as a notebook, close the lid and the back screen comes up as a tablet.  Neither screen was operating and it had been sent to Asus to look at.  I suggested that I should be able to get his data off the notebook as Asus would not provide this service.  Eventually a quotation was received which was quite high – you could buy a second hand Asus Taichi 21 on eBay for much less than the quote, so eventually it came to me to look at and get some very important files from it.

On inspection, the notebook as an internal SSD which at first glance looks like a normal mSata or M.2 SSD however on closer inspection – it is quite different.  Further research indicated that there were adapters available that would convert this SSD to standard Sata – and I was fortunate enough to find a local Sydney supplier that had one of these in stock for $20 or so.  I ordered one, and when it was ready – went for a  short drive to pick it up.  Now the adapter looked like it wasn’t the right one, but they assured me that it would work.  The socket is much larger and is not quite the same as the socket on the motherboard, so after some further research, I decided that it should work.  Of course, this can be a risk that could destroy much wanted data – but there were no indications on the internet that these adapters posed a problem.

dsc_0285

This shows the adapter with the SSD installed.  Note the size of the socket.  This adapter is used for the Asus Taichi and UX21/31 notebooks.  See below, for a photo of the motherboard with its socket.

dsc_0279

You can clearly see the difference as the motherboard socket has 6 and 12 pins, but the adapter socket has many more pins.  Anyway, I connected the adapter to my recovery machine, and it was recognized by the Bios and by my Ubuntu operating system.  I went to mount the disk, but it complained that the partition had not been cleanly dismounted.

No real problem, the way to get around this is to mount it as read-only which will ignore the dirty bits as I only want to copy data from it.  After doing an “fdisk -l”  to list the partitions, I eventually used the “mount -t ntfs -o ro” command to mount the partition and then was able to copy the required data to any external usb disk.  The D: drive folders and contents which is what I copied – as this was what was required.

After that, I reassembled the notebook and that was that, or was it?  A quick search of the internet showed that the motherboard “60-NTFMB1102-D07” was available for a few hundred dollars which would likely fix the notebook, but that is another story.

Recover.IT – HP EX490 MediaSmart Server – Part 2

This is part 2 of the recovery of the HP EX490 MediaSmart Server – which is a Windows Home Server machine. The second drive on this server was seen to be offline, so I had shut down this server to investigate the problem.

Last Saturday, I ran some tests on the drive as previously mentioned. On Wednesday night, I decided to copy the disk to a new 3TB disk that I had just bought – a Toshiba 3TB drive with 3 years warranty for $127 each from a local computer shop. I thought that this was a good price.

Anyway, as you might have guessed – I connected this disk on a Linux machine. The Linux in this case was Ubuntu. I used the dd command (that I have previously mentioned) to copy raw data from the disk directly to the new disk.

dd if=/dev/sdb of=/dev/sdc conv=noerror,sync 2>&1 | tee -a ./logfile.txt

Now, of course – I did a smartctl -a /dev/sdb first to check the source disk, and then another one – smartctl -a /dev/sdc to confirm the destination disk. The source disk is a Seagate – correct, and the destination disk is a Toshiba – also correct, so I was good to go. It is good to check, and don’t assume that because the Seagate is connected to SATA0 and the Toshiba is connected to SATA1 that the disk designations will be in the right order.

Ok, so on Wednesday, the copy was started – then I went back to the machine some time later to check on its progress and I see these errors on the display.

dd: error reading ‘/dev/sdb’: Input/output error
6364552+0 records in
6364552+0 records out
3258650624 bytes (3.3 GB) copied, 346.982 s, 9.4 MB/s
dd: error reading ‘/dev/sdb’: Input/output error
6364552+1 records in
6364553+0 records out

6,364,552 sectors were read and copied before an error occurred. The noerror parameter means that it will continue, and sync means that the unreadable sector will be replaced on the destination with a blank sector. I stopped the copy at that time, since it is not a good idea to keep trying to read bad sectors in case the drive decides to quit permanently.

Then last night, I decided to copy from a point after this sector. This time I used this command line and let it run overnight after it seemed to start without throwing up any errors.

dd if=/dev/sdb of=/dev/sdc conv=noerror,sync bs=1M skip=4000 seek=4000 2>&1 | tee -a ./logfile.txt
1903728+1 records in
1903729+0 records out
1996204539904 bytes (2.0 TB) copied, 24148.3 s, 82.7 MB/s

For that command, I set a block size (bs) of 1MB, then used the skip and seek parameters to begin at a point 4000MB into the drive, on both the source and the destination. I checked this morning when I woke up, and found that it had completed successfully – the time taken for the copy works out to about 6.7 hours.

This evening, I also bought a Toshiba 2TB disk drive on my way home – I will talk about this later on. Ok, so I had copied about 3.3GB on Wednesday before it hit the bad sectors. Last night – I started the copy at 4GB or thereabouts onwards and it copied to the end. Now I did a few more copying commands – I won’t bore you with all of the details however the result was to copy the remaining good sectors, using the count parameter to specify how many blocks to copy.

Eventually, I had copied every sector that was able to be copied. It turns out that sectors 6,364,553 to 6,364,568 – 16 of them was unable to be read, not too bad. I also copied a couple of blocks before and after the bad sectors and had a look at the data – it seems to be file information, most likely parts of the Master File Table – which means that a few files are potentially lost.

Ok, this is where my new 2TB drive comes in. I put the faulty Seagate drive back into the EX490, and then added the new Toshiba drive into the top-most bay. After powering up the MediaSmart Server, and waiting – I was eventually shown two solid green lights – which means that the Seagate drive is now online together with the main WD drive, and one blinking green light which was the new Toshiba drive. I logged onto my Windows Home Server console and went into Server Storage and proceeded to add the new drive.

Screenshot 2016-08-05 19.45.01

The idea is to add the new Toshiba drive, so that WHS knows that it is available for storage, and then tell WHS that I want to remove the Seagate drive.

Screenshot 2016-08-05 19.45.51

You might ask, why am I doing this? The drive has bad sectors – it isn’t a good idea to keep using it. Also WHS allows me to remove this disk – by moving and redistributing the files on the disk to other available disks, like the new one that I just added.

Screenshot 2016-08-05 19.46.11

Great, it says that I have sufficient storage space to have this drive removed.

Screenshot 2016-08-05 21.42.40

Ok, I am not actually going to sit here and wait for it, but eventually it will (hopefully) tell me that the drive is ready to be removed. Depending on how full the disk drive was, it can definitely take many hours. Windows Home Server is actually really good, because most storage systems don’t allow you to remove disk drives once they had been used for storing data.

What about the 3TB drive, you are thinking? That is for insurance – in case the disk stops working during the removal, then I have a copy of it that I can use to copy files from. If this removal works successfully, then my 3TB drive can be retasked. By the way, Windows Home Server cannot use disk drives larger than 2TB without major surgery. The reason for this is that WHS uses partitioning based on the Master Boot Record. In order to use drives larger than 2TB, it is necessary to use GPT partitioning – but that is another story.

What about the 16 bad sectors on this Seagate drive? Once I take it out, I plan to do a factory erase on the Seagate drive – this should rewrite every sector on the disk, including the bad ones and I should end up with a disk drive without bad sectors. I can then use it it either for temporary storage of non-critical data or run lots of diagnostics on it to see if it is continuing to fail. If it holds up to the diagnostics, maybe it gets a second chance on life.

In the meantime, I am off to bed!

Restore.IT, Recover.IT – 2006 – When Murphy’s Law just wasn’t funny anymore! Or pages from the diary of a high-flying IT consultant and troubleshooter!

I was going through my old diaries with the view to putting the pages into the recycle bin when I came across an entry in 2006 that brought back painful memories (and perhaps tears to my eyes). This was an example when Murphy raised his head and continued doing so with near disastrous consequences – ok, my exaggeration – you can be the judge. The names have been changed to protect the innocent. A warning – this post is a long one, feel free to zone out and zone back in again further down. I have put everything into a timeline since that is what I get from my diary – also racking my memory to fill in gaps in my notes. I don’t have my original notes and detailed documents because all files had to be returned to the company when I got WFR’ed in 2010.

February 2006 – I got outsourced to a well known IT company. Basically we were given a choice, we move over or we leave. Leaving was not really an option for me, so I was the only one in Australia that got outsourced. 1 out of 3 – not bad!

April 2006 – Customer office in Malaysia was moved to another location. This included servers, networks etc, the whole kit and caboodle.

Fast forward to October 2006…

25th October 2006 – Malaysia server NTS4 (not its real name but similar) had shutdown during the afternoon. Yes, NT does stand for Windows NT.

26th October 2006 – During the late afternoon, I hear about the outage – NTS4 was down at 13:09 Malaysia time yesterday. We arrange to get it restarted.

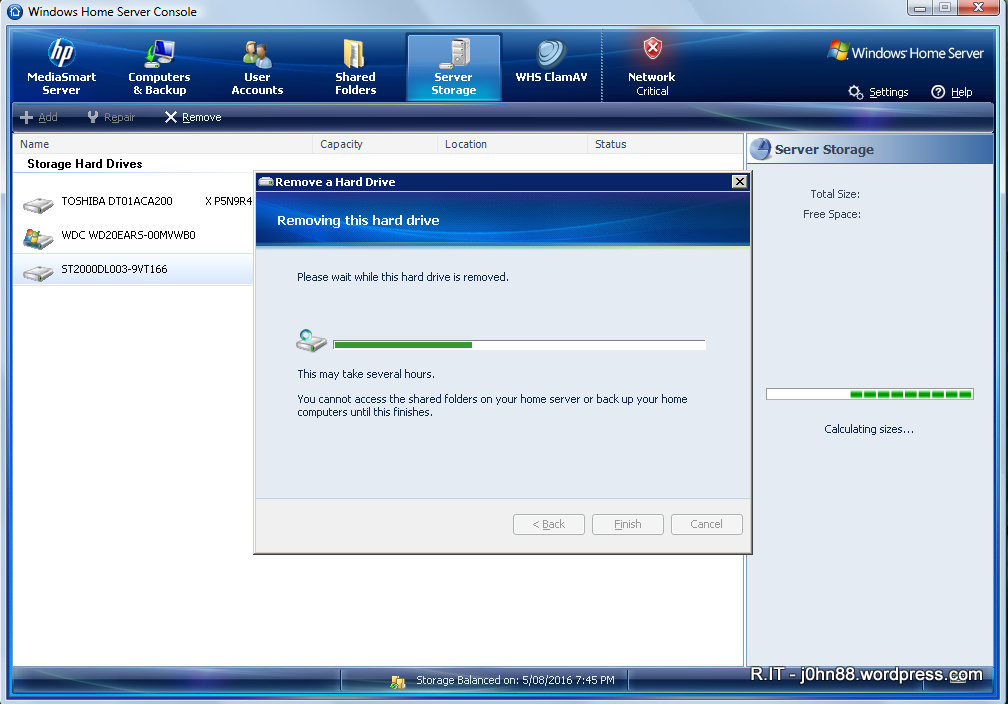
27th October 2006 – We find that the tape backup drive is not connected. Also we find that the disk drive in slot 4 has failed. After some conference calls, we determine that the disk had failed before the site move but apparently nothing had been done about it – [Murphy 1: Customer 0]. This was escalated to get the drive replaced. This drive was part of a 5-disk RAID-5 array.  RAID-5 can handle a disk outage but requires replacing the failed drive as soon as possible, otherwise it operates in a degraded state with no fault-tolerance.

28th October 2006 – Engineer is scheduled onsite in Malaysia in the morning. A short time later, I get a call – the NTS4 server is down. Conference calls for the next three hours – it appears that the server is unable to boot as it has lost another drive, although this time the error report indicates that a drive was removed. We check with the engineer – he denies touching anything. All drives are still in the server – so, if the drive was removed, it was put back in – but that was already too late because the array controller now has two drives down, so what really happened. Anyway, I get on the phone to the regional service manager – I tell him that if the drive was removed, the data on the drive should still be intact and I would (with 99% certainly) be able to recreate the array using the data from each disk drive except the one that had failed a long time ago. I also tell him not to let any engineers do anything to the server before I get there.

A few hours later, after more conference calls – we decide that we need to bring services back online. NTS4 was both a SQL database server and a Microsoft Exchange server. I commence copying Exchange installation files from Singapore to another Malaysia server NTS8 which will become the replacement Exchange server.

Fast forward a couple of hours – I get a call that the server NTS4 has been fixed. That was when I had the knot in my stomache, shivers down my spine and knowing what comes next – like when you are standing on the edge of an abyss with the wind behind you getting stronger and stronger and nowhere to go.

What happened is a case of pride before prudence (not prejudice – ok, pun). My company’s Wintel Level 3 is based in Malaysia – they are supposed to know everything there is to know about Windows and Intel servers – however, as I found out, they know little about data recovery. Pressure was put on them to resolve a problem – why should an outsider (yes, myself – a newcomer with only 8 months in the company) be the only one that could fix the problem. When this was put to you by a big boss, how can you say that you can’t fix it – of course you can fix it. So what they did was to replace the long time failed drive and the one that had been removed. The array begins rebuilding – smiles all around… Except that the server does not boot – of course it was obvious to me, but I knew then that the data was essentially lost. [Murphy 2: Customer 0]

Ok – no point in crying over spilt milk – the only other course of action (with little hope) I could suggest is to have the server looked at by a data recovery company. My company does not have a data recovery department (surprise) – something that I have suggested, so an external company was required. A suitable company was located in Malaysia – and the server is being packaged up to go to them – cost would be 8,000-20,000 Malaysian Ringgits (irrelevant) and about 1 week turnaround. I finally got to bed on that Saturday at about midnight to try to get some sleep before a scheduled conference call 4 hours later.

29th October 2006 – Looks like that particular Sunday would be full-on. I am right. 04:00 conference call, followed by more work and more calls. I forgot to mention that I am also responsible for Microsoft Exchange 5.5 Level 3 support especially for these emergencies like server restorations. For about 7 hours, I work on installing Exchange 5.5 on NTS8 and finally around 21:30 I get all the mailboxes created. Then spent the next 3 hours getting replication and the X.400 Connector working to the Singapore regional bridgehead. Got to bed at about 1AM.

30th October 2006 – Got up early on a fine Monday morning and started installing the Trend Micro ScanMail and End User Quarantine software for Exchange. Installed Backup and service monitoring agents – yes, I basically install software for the entire infrastructure. Then to prepare for Microsoft SQL – copying install files to Malaysia from Singapore. We would use NTS8 for SQL – the Malaysia customer office uses SQL as the database backend for AccPac accounting software.

31st October 2006 – More work getting SQL installed and finally ready to look at restoring databases. A problem arose trying to read from the NTS4 tapes – it looks like the tape drive wasn’t working for some reason. I would probably have to actually go these, since I am also the level 3 support for Arcserve backup software – my company didn’t really have people who know much about these old applications, and I had been supporting and installing those applications since 1996. Anyway, the Malaysia customer office had email working and accounting database could wait until I get there to restore the NTS4 server from backup tapes.

Over the next 24 hours, I work on a site recovery and contingency plan. I knew that I would have to restore the NTS4 server from tape, so would need to export and import the mailboxes from the restored server to the new server. There were quite a few steps that would be needed in order to affect a good recovery and minimize any further downtime. Towards the end of the job, I expected that there would be a number of late nights involved.

2nd November 2006 – The report back from the data recovery company was not good. They cannot do anything because the array had been reinitialized. There were lots of files that could be recovered, but the main files we are wanting are the Exchange & SQL databases and associated log files – these are very large and much of the data had been lost due to the data striping of the array. I.e. two drives introduced forced a rebuild which is basically a reinitialize. A quarter of the actual data being efectively replaced with zeroes was what I estimated had happened. The server would be returned to the customer site.

6th November 2006 – The NTS8 server is down. Oh no! An IBM engineer is requested since this server is an IBM xSeries server. I thought at the time, that I should start arranging my travel and book flights. I get approval from my manager to fly to Malaysia from Sydney with the purpose of rebuilding and restoring NTS4 and to resolve NTS8. I get a call from the IBM engineer – the server is down due to a bad stripe. [Murphy 3: Customer 0]  How can that happen?  [It seems that if data within a stripe becomes inconsistent due to media errors, i.e. bad block (or part of) on the hard disk, then the stripe becomes bad. For instance, with three drives in RAID-5 and a block size of 16KB, this means that 32KB has become unavailable – and if this is part of an operating system file, then that could be preventing the server from booting.]  Flights arranged, SYD-SIN, SIN-KUL for the next day.

7th November 2006 – Left home at 05:30 heading to the airport for a 08:30 flight to Singapore. Arrived about 13:30 Singapore time and waiting for my 17:00 flight to KL. I get a call from the IBM engineer – he can fix the bad stripe. Really? Ok – how? Delete the array and recreate the array – yeah, right! What about the data? No problem – the data should be fine – no thanks! I forbid him to do this as I am on the way to Malaysia – don’t touch the server until I tell you to! I can be forceful when I need to be.  Deleting and recreating the array will definitely lose the data – I was not going to lose two servers in a row, no way, if I could help it!  I finally get my flight and arrive in KL and head to the hotel – arriving around 19:30 just in time for dinner – best to eat and get a good night’s sleep because tomorrow would be a long day.

8th November 2006 – Arrived at Malaysia customer site at 08:25. I have a look at both NTS4 and NTS8 servers. I carry a couple of Linux CD’s with me all the time. I planned to boot each server with a Knoppix live CD and run a “cat /etc/fstab” command – this would list the drives and file systems that Knoppix (Linux) recognizes as being available.

NTS8 – single drive, 2 partitions. /dev/sda1, i.e. C: drive on NTS8 is corrupted at about the 7.5GB point. /dev/sda2, D: drive appears intact – fantastic, because this is where the Exchange server databases and logfiles are stored. This is great news because it means that I can “recover.it“.  If I could get those Exchange databases and logfiles copied and restored successfully in the correct manner, the users will have all their email up to the point of failure – that was the best that anyone could hope to achieve.  I scrounged around looking for a machine with sufficient storage capacity – I finally found a relatively new desktop with enough space. I enabled Samba and then shared /dev/sda2 and started the copy of the Exchange databases and logfiles, etc to the desktop machine. I also wanted the Arcserve databases and logs.  It took a while because the files are quite large – especially Arcserve and even though that Exchange had only been running for approximately a week until it went down.

I reconfigured NTS4 to connect all of the disks to the inbuilt SCSI controller instead of the Smart Array controller.  Knoppix recognized 4 drives, 18GB, 18GB, 18GB, 36GB – I set up to copy the contents of each disk across the network to my laptop. I would use this data to test my perl script – the one that I would have used to rebuild the data if the disk array had been left as I had requested instead of being interfered with and effectively destroyed by the reinitialization process.

When the copying from NTS8 had completed, I started the copying of the files from the desktop to my usb disk – careful is my middle name, especially when it comes to critical customer data.

I rebooted NTS8 as it was time to “restore.it” and booted from the IBM ServerGuide cd. I erased the disk array and then started the install which would create a new array and then install Windows 2000 – since this is what had been running on NTS8, however it hung up when Setup is starting Windows 2000. Bummer!  Anyway, it was late – 20:45, better to get some rest and start afresh in the morning.  I called the IBM engineer, explained what I had done, and told him that his services were no longer required.  He could go ahead and close the call-out ticket.

9th November 2006 – In the office early again.  I worked on NTS8 again, trying to install a couple of times until finally the penny dropped, disconnected the tape drive and tried again. Success – it seemed that during the ServerGuide installation, it would hang trying to detect additional hardware, so best not to give it hardware to find and not know what to do with.  Windows 2000 Server installed – great.  I then quickly installed the Arcserve backup application and restored the D: drive then restored the C: drive including the system state. This overwrote the fresh installation with what had been backed up during the last full backup which fortunately was the night before the crash. I rebooted when the server was ready, and then stopped all of the Exchange related services.  I started the copying of the databases and logfiles from the desktop machine – this should put back into place the files up to the point of failure – at least for the email system.

Done – files are back in place – quick check of the files – they looked ok, file sizes the same as on the desktop. It was necesary to run a recovery process so that the files could be fully integrated into Exchange and the system registry. I ran the following commands – unfortunately I cannot give you a lot of detail on them as it isn’t relevant to this post, but suffice to say that the commands and specific order are necessary – as any Exchange 5.5 level 3 engineer will tell you.

“eseutil /g” – a few errors seen, not a problem as they were expected. “eseutil /r” – soft recovery completed successfully. Started the System Attendant and Directory Service services for Exchange, then logged off and logged on with the Exchange service account. “isinteg -patch” – completed, no errors. Started all remaining Exchange services – voila! Exchange is running.  Fixed Trend Micro ScanMail due to the antivirus patches not updating.

All users are informed that email is now accessible and that mail should be at the point of failure – hooray! [Murphy 3: Customer 1]

I then copied the databases for Arcserve so that Arcserve was back to the state at the time of the server crash.  All done.  It was time to look further at NTS4. I reconfigure the disk drives back to the array controller as by then I had all of the disk contents and can work on rebuilding the server. I installed Windows NT 4.0. While that was happening, I had a look at the tape drive to find out why it was not being recognized.  I saw some bent pins in the scsi connector – how did that happen?

DSCN2696

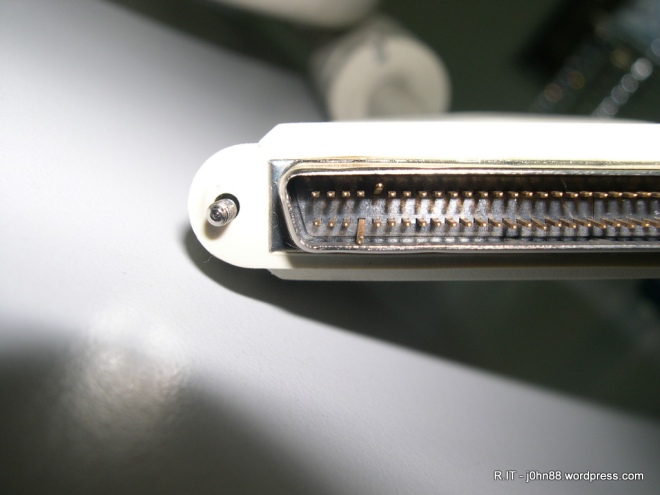
The penny dropped – it happens a lot!  During the site move in April 2006, they would have disconnected the cables to move the equipment and reconnect.  Whoever reconnected the cable to the tape backup unit obviously did so very clumsily and the backup unit was not tested afterwards. [Murphy 4: Customer 1]

10th November 2006 – I had to checkout of the Crystal Crown Hotel – and would move to another hotel – Hilton PJ, later in the day.  When booking flights and accommodation on short notice, we could not always get the one hotel for the entire stay.  Flights to Singapore and then back to Sydney were reserved.  Installed SQL Server 2000 onto NTS8 in preparation for restoration of AccPac databases. A slight (conservatively) hitch had to be resolved, last backup of NTS4 was probably the one before the office move in April – what to do?  Ok – not my problem, someone else could worry about that. I continued with my recovery plan to finish the NTS4 reinstallation in preparation for data restoration from tape.

11th November 2006 – The last backup tape of NTS4 (17/04/2014) was merged into the Arcserve database on NTS8 – this was needed before restoration from the tape was possible.  Restored two backup sessions to a temporary folder on NTS8. Attempts to restore session 3, resulted in session 2 being found instead – what gives? [Murphy 5: Customer 1]

12th November 2006 – It appears that Arcserve 6.61 when doing a full drive backup would allocate space on the tape based on the expected backup size requirement, however during the backup – some files may be unavailable, hence the actual backup is smaller resulting in slack space on the tape. This was causing a problem with the restore because the tape could not be positioned to session 3 properly.  Actually on further analysis, there appeared to be an extra session in between 2 and 3, so that 3 was not real, but trying to restore 3 ended up with 2. Restoring session 4 just failed because if it got to 4, it would see 3 and fail – pulling my hair out just didn’t help.  To rule out a tape drive problem, I decided to copy the tape to another different tape media. I used the tapecopy command to copy all sessions from the DLT4 tape to the SDLT1 tape. As it was going to take some time, I began analyzing the data I collected from NTS4 disks before the reinstallation.  I updated my perl script so that I could recreate the logical drive – as an academic exercise.

13th November 2006 – The tapecopy had completed. After deleting the tape from the database, I re-merged the tape in Arcserve – to my immediate relief, all backup sessions were visible and in the correct order. [Murphy 5: Customer 2]

I was able to restore the first three sessions comprising of C:, D: and F: then the fourth session being the System Registry was also successful. Next on the list was to restore the SQL databases – another hitch – the restore fails with “no valid destination” – I cannot restore the databases to NTS8 when they were backed up on NTS4. This was apparently a limitation of the backup agent.  NTS4 and NTS8 were on different Windows domains – I had to establish a trust between the two domains, then was able to restore from NTS8 directly to NTS4 when restoring to the original location. It wasn’t quite that straightforward as a reboot was involved and the Master database had to be restored first before restores of other SQL databases could work – but it was done. [Murphy 5: Customer 3].

Unfortunately we didn’t really want the SQL databases back on NTS4 because that server was already obsolete, so we decided at the time, that another server NTS5 would become the SQL database server. Since SQL Server was no longer needed on NTS8, it was uninstalled as it was intended to be temporary anyway for the purpose of restoring the databases.

14th November 2006 – It was time for the Exchange database restoration on NTS4. The Exchange site was isolated, to avoid replication – essential when doing an online restoration of old databases. The Exchange database restore was commenced. In the meantime NTS5 was worked on to install SQL Server and Arcserve backup agents. I also did some further work on my perl script for the raid recovery test.

Whew! Still reading this? I did say that this was a long post. Anyway to cut a long story short – in the remaining days of that week, the Exchange databases were restored to NTS4. Exchange was brought up and verified that the mailboxes were intact – which was fantastic. All mailboxes were then exported to pst files using the Exmerge program. These pst files were uploaded to the NTS8 Exchange server.  All of the users were happy to get more emails back, but not so happy that the emails between 18/04/2014 to 28/10/2014 was irretrievably lost. Sql databases were also moved to NTS5 and my job in Malaysia was done except for some cleanup actions that could be done remotely. [Murphy 5: Customer 4]

This was an example of some of the things that I encountered during my roving life as an IT consultant and troubleshooter. In those couple of weeks I had to contend with multiple failures involving disk arrays and had to perform server recoveries and restorations under difficult circumstances.

Did we break even at Murphy 5: Customer 4 – doesn’t look like it?  Oh yes, the backup tape was six months old – what about the AccPac accounting databases, I can hear you asking?  My company had to hire a number of data entry people to input all the accounts for the six months or more based on the accounting printouts that they had – lucky they had hard-copies, right?  And yes, the whole accounting process had to be followed, April data entry, then April end of month closure, printout, May data entry… A month or so later, the data entry was completed, and AccPac was rolling ahead! [Murphy 5: Customer 5]

[PS] I feel a bit sorry to put you through all of this, but I hope you understand that an IT problem is not always straight forward. I also tried to keep the relevant parts as it is possible that others may encounter this situation in the future and may find some help in this post.  I forgot to mention that I did finish my perl script to recreate the logical drive of the failed array, then during analysis, was able to show conclusively that the array had been reinitialized which was why the data was lost. Further to this, I was able to confirm during testing on equivalent hardware that taking a 5 drive RAID-5 array, I could pull out one drive and lock it away to simulate an old failed drive, then pull out a second drive to crash the array – read the contents of the four available disks, then I could use my perl script to recreate the data on the locked away drive, and also to recreate a logical drive that is the same as converting the array into a single larger drive. All this using a perl scripting language that is over 20 years old – and the script comprising of only a small number of actual commands. For those of you who know perl, you will understand “$b5 = $b1 ^ $b2 ^ $b3 ^ $b4;” – that is the magic line. Everything else was just definitions, reading, writing and looping.

Maybe we could make a movie out of this – but of course, no car chases, no martial arts, no gunplay, no scantily clad women – no fun, right?

Read.IT – The Future of IT: A Strategic Guide

This is interesting.

http://www.zdnet.com/topic/the-future-of-it-a-strategic-guide/

This is one of reasons that I am broadening my horizons, don’t want to be left high and dry on the beach when the waves go out.  Ok – that’s not too bad, being on the beach I mean, but doing that as a living is going to be difficult – unless you have millions stashed away, not me.

I have been working in IT since about 1988 actually.  I studied Electrical Engineering at UNSW which was in line with my interest in radio and electronics.  I got my amateur radio license in 1974 but seem to have moved away from that for a number of years.  Too many problems with interference – i.e. a lot of equipment now is very susceptible to interference, due to quite shoddy design and packaging.  An amateur radio operator in the past had to deal with lots of neighbour complaints about – the TV is going funny everytime you get on the microphone… so we used to do things like add interference filters to antenna cables at our own cost a lot of the time.

Back to IT, I spent a number of years in the retail industry – supporting computer and network sales, with some time in distribution supporting resellers and dealers.  I had a knack of seeing problems quite clearly – i.e. the window I look through is crystal clear, the other peoples windows are dusty, haven’t been cleaned for a long time.  For some time I travelled around Asia Pacific as an IT consultant and much of what I was doing was troubleshooting.  Fighting fires before they explode, sometimes just smothering them before they flame up.  During that time came the GFC – business class became economy class, economy class became video conferencing and conference calls – things took longer to get fixed…

Then about five years ago, I ruptured my Achilles tendon during a badminton competition, had to have an operation to fix it and a couple of months later, got called in to the office for a meeting and after hobbling in on crutches, I was told that my job had gone – i.e. WFR – workforce reduction.  That was coincidentally just about this time five years ago – a week earlier I think.

Anyway, my neighbour has called in, and I showed them the virtual machine that is currently running, however they cannot send email – the Optus network is not allowing relaying through a Telstra network most likely.  Better look at that.