Replace.IT – Vehicle Speed Sensor on Honda Civic 1999 sedan

Late January, my son sent me a message that there was something wrong with the car. The car in question is our Honda Civic 1999 sedan which my son had been using. Apparently the speedometer stops working and the engine warning light comes on.

I got him to bring the car over and leave it with me, so I can get it serviced. I took a photo of the dashboard.

The dash is a bit dusty – and the odometer showing 240135 – that’s a lot of kms. I arranged to take it in to the local mechanic. The engine was out of oil as well and apparently long overdue for a service, so the service was done. The mechanic ordered a vehicle speed sensor for it, as he said that it was the most likely failure. In due course, it arrived, but turned out that it wouldn’t fit this particular Civic. Anyway, he didn’t have any other part that he could get, so I collected the car from him. He mentioned that if I was able to get the right part, he could help me fit it.

I looked around the back of the engine gearbox and found where the speed sensor was located.

That is the black thingie towards the top of the photo. Anyway, I found one of these on eBay – it stated that it was for my year of car, so ordered it. It took about a week to get to me, which was strange as the listing said it was Australia stock.

Anyway, I could see that it looked the same as what I wanted, so go my socket wrench out to remove the retaining bolt. Good try! The bolt was tight and I couldn’t get enough leverage stretched at arms length to undo the bolt. I called the mechanic, who was busy but said to call him the next day.

I called the next morning, and he said – bring it over. It took him a minute or so with a long extension socket wrench to comfortably remove the bolt without even stretching. He swapped the VSS and replaced the bolt. Overall a two minute job and he didn’t charge me for that, even though I offered to pay – great mechanic.

The question is – did this fix the problem? The speedometer worked while driving the car home. The rest would be up to my son, who took it back and after a few days (back in February), said that all was ok. Speedometer and Odometer – both working, no more engine warning light. Another successful Repair.IT job which was non-electronic. From a Google search, if replacing the VSS didn’t fix the problem, it was likely that the speedometer motor had failed, or there were dry solder joints in the speedometer circuit board – but fortunately, I didn’t have to go down that track.

The car is getting old, but is now functional – eventually, it will need to be replaced, but that is up to my son, now.

Replace.IT – Coin battery in a Hantek DSO5062B Digital Storage Oscilloscope

I bought this Hantek DSO5062B Digital Storage Oscilloscope back in July 2013 as a replacement for my aging Hung Chang DS-635 35MHz Oscilloscope. The DSO5062B is a 60MHz oscilloscope and has a colour LCD display.

My DS-635 was bought in the early 1980’s and had served faithfully but had started to have intermittent faults. I meant to have a look at fixing it, but at the time, there was an offer on these Hantek’s, so it was a good opportunity to upgrade.

The digital storage has been very handy to look at waveforms and digital protocols, like serial output from unknown equipment. Just recently I got it out to help with the repair of the Ikea Striberg Led Lighting Strip. Once triggered, it would sample the waveform and then I can look and inspect various aspects of the waveform at my leisure. The old analog oscilloscopes could not do that – we would have to set and change trigger settings, delayed trigger etc – to view the waveforms for the detail that we wanted.

While using it for the Striberg, I noticed that it was not keeping the time. It is supposed to contain a real-time clock, but the manual didn’t mention anything about it. Eventually I found that the second page of the Utilities Menu allowed me to adjust the date and time.

It was then a matter of highlighting each field, press V0 then rotate to change the number, press V0 to set it, then rotate to the next field etc. After doing this, I left it for a short time, then turned off the DSO.

After turning on the DSO, the clock was reset again – looks like it works while powered on, but then forgets. The manual was checked again, and there was no mention of a clock battery. Sometimes these are powered by a NiCad battery which has probably gone flat, or maybe there is a coin battery – but the manual was of no help at all. A check of Google only showed replacing the lithium battery for portable Hantek oscilloscopes.

I then decided to open the case – two screws near the mounting feet, and two long screws under the carry handle. Once the case back is removed, this is what I see.

The power supply is the main part visible, then the main circuit board protected by a metal cover. If the oscilloscope had been powered up recently, the big capacitor on the right can still hold a lethal charge – even after a couple of minutes, so leave it for a while, if you are going to work on the power supply.

The metal cover has five screws, and once removed, I spied a coin battery in the corner. If I was to choose the most inconvenient place to put a removable coin battery, that would be the spot.

After some effort, I managed to pop the battery out – it was a CR2025 and measured 0V on my multimeter. I didn’t have any new CR2025’s in my spare battery box, so opted to borrow (steal) one from a camera remote control – one that I knew I wouldn’t need for a long time.

Once installed, I put the metal shield back on, then the case. Turning on, I set the date and time then let it sit for a while. 30 minutes later, I turned it on, and saw that the time and date were now correct. Hooray! Another repair done, by replacing an undocumented CR2025 lithium coin battery in the digital storage oscilloscope. Now to update my register of battery requirements. That’s it for now.
[P.S. Some of you might have seen the little sticker with red writing – that says “Remove seal after washing”. This covers the piezo speaker so that the solvent (used to wash the printed circuit board to remove flux and other contaminants after wave soldering) doesn’t get inside it and stop it from working. Actually I think it is better this way, as the beeps can get too loud, otherwise.]

Replace.IT – Swollen battery for Xiaomi Redmi Note 4

This story begins about two weeks ago. Do you know that often – one thing leads to another? This story is a bit like that. I noticed that my phone, the Xiaomi Mi A3 had some very fine scratches on the screen. When I bought that phone, I had also ordered a glass screen protector which arrived in many pieces, so that got refunded and I didn’t get around to getting another screen protector. My wife’s phone was the Xiaomi Mi A1 and it had a plastic screen protector that was very worn, so had patches on it where the top coating was missing.

I ordered glass screen protectors for both phones from eBay. Eventually they arrived a few days later, so last week – I was putting the glass screen protectors on the phones. After doing this, I then had a look at my old phone, which was a Xiaomi Redmi Note 4 – for which I had a spare plastic screen protector. I thought while I had the cleaning materials out, I should swap the screen protector for this phone at the same time.

After removing the Note 4 from its case, I noticed that the screen was bulging out. Then I noticed that the back was bulging too! I remember that for a while now, this Note 4 was getting quite hot when being used, and now I realize that it must be due to the failing battery. This battery had been replaced in October 2018 – just about three and a half years ago. I still had all the tools to remove the back cover, so decided to do just that.

There are two tiny screws on the bottom where the micro usb (charging) port is located – it needed a small pentalobe screwdriver to remove the screws. Then it was a matter of using the plastic prying piece, which looks a bit like a guitar pick. I finally remembered that it needs to be pried where the metal back cover is contacting the plastic around the screen. The best part to do this was where the charging port is located, so eventually removed it. I saw that the battery was swollen – puffed up a bit like a balloon, but not that big, of course.

The battery is hermetically sealed, or at least – it should be. When it begins to fail, it can generate more gases than can be recombined, so these excess gases lead to the bulging of the battery. If it wasn’t airtight, exposure to water vapour in the air due to humidity can cause catastrophic failure, i.e. you hear stories of phones burning – yeap. This can happen also if the gases continue to increase until the plastic around the battery breaks (pops) – then yeah, burning can happen, since lithium is a highly reactive metal.

A quick check on eBay shows that the BN41 battery is still available, so was able to order it a couple of days ago. It should arrive sometime next week. In the meantime – what do I do with this swollen battery, and come to think of it, the batteries that had been swapped from the UPS’s, and all the other batteries. The lithium battery should be stored in a fireproof bag, but I don’t have one handy, so might be best to be placed in a tin box.

Remember those old alkaline batteries, AA, AAA and 9V ones! These are all meant to be recycled, and not thrown into the garbage. I had been putting the old batteries into plastic bags and stored in the garage. Also a lot of rechargeable batteries, NiCd, NiMH – were similarly stored. Old battery packs from broken cordless tools were also stored in the garage. I did mention that one thing leads to another – I started by replacing screen protectors, then needed to get a replacement battery for a phone, and now need to dispose of all of the old batteries. Come to think of it, I still have the old car battery that came out of the Honda Civic recently when it failed and needed a replacement.

I looked on the local government website for battery recycling and eventually found a place nearby – Battery World at Northmead North Parramatta. I sent them an email asking about whether I can drop off these old batteries and they replied back that I could do this any time. So on Wednesday, I will most likely bundle all of these batteries, including any others that I find and drop them off to be recycled.

I realize that not everyone sends batteries to be recycled, and often the alkaline batteries are tossed into the garbage along with everything else that is discarded. In Australia, about 98% of lead-acid batteries are recycled. Most of these are of course, car and truck batteries – usually when being replaced, the servicing guy will take the old batteries away to be recycled. If you buy certain brands of UPS batteries, they used to come with a freight label to send the old battery back – I don’t know if they still do this.

Lithium-ion and associated batteries though – only about 2% of them get recycled here in Australia. The CSIRO says that Australia produces 3,300 tonnes of lithium-ion battery waste a year, and this increases by 20% each year, and may hit 100,000 tonnes by year 2036. Lithium-ion batteries are used almost everywhere now – laptops, phones, portable electronics, electric vehicles and now even some UPS’s are using them instead of lead-acid ones.

So let’s do our bit for the environment – if you have old batteries lying around, check with your local council or local government on what to do with them. Now I just need to wait for the phone battery to arrive, and I can complete my repair.

Replace.IT – APC UPS batteries

Do you use a UPS, or maybe ask – what is a UPS? A UPS or Uninterruptible Power Supply is a mains power device that continues to supply mains power in the event of a blackout which can be an outage that happens briefly or can be for many hours. A UPS has internal batteries – sometimes a single battery or often for higher power or higher runtime, have multiple batteries in series.

UPS’s traditionally came with internal Lead-acid batteries, but in the past few years, more modern UPS’s now can have Lithium batteries. Lead-acid batteries have a limited service life – like those in cars, they need replacement from time to time. Some UPS’s have an internal self-test mechanism that can alert you to a failing battery. Others will not, and the only time you find out is when a blackout or even a brownout occurs. Your computer turns off and you hear the silence.

Over the years, I have used APC branded UPS’s. APC was a company called American Power Conversion Corporation, and now the brand has been acquired by Schneider Electric. Most of the APC UPS’s are still able to be serviced, which is one of the main reasons that I chose APC at the beginning. I used a UPS to protect my home network which comprised of a domain controller and a firewall, then gradually expanded over the years to include one NAS, then two – and eventually now, I have many UPS’s.

One UPS protects the NBN modem that enables my hybrid coaxial internet connection. Another UPS protects the Telstra Smart Modem that then makes the internet available and my home phone line. A main UPS then protects my virtual machine host, and various NAS storage etc. These are not the only ones though – my son has one for his desktop. Right now, there are 6 of them and recently a couple have given battery failure alerts.

Service life – generally speaking, we should get 3 years out of them and if lucky can be longer. The point of this was that I needed to replace the batteries in order to get the UPS’s back in operation.

My son’s UPS was a APC Back-UPS 1400VA – with a model name of BX1400U-AZ. I go to the apc.com website, choose Support, then Find Your Replacement Battery. By entering the model name, I get a choice which when chosen tells me that this UPS needs a RBC113.

I did try to get a price on this but my main supplier did not seem to have this in stock, so I decided to look for equivalent batteries. In particular, I was looking at CSB batteries. I need batteries that are designed to be used in a UPS, and I needed to find the right physical size and equivalent capacity. Eventually I managed to find out that I needed 12V 9Ah batteries that physically were the same size as the common 12V 7.2Ah batteries. The connection terminals needed to be F2 types which are 6.3mm or quarter-inch terminals.

In addition to this, I had a call from the security company saying that my alarm system was reporting a failed battery, so I would need a 12V 7.2Ah battery for that, with F1 terminals.

I also had another UPS, a APC BE700G-AZ which also needed a 12V 9Ah battery (RBC17). Then another UPS BK650MI needed a RBC4 which was a 12V 12Ah larger battery. Then checking on the UPS for my NBN and Telstra modem, which was a APC BK350EI that uses a RBC7 – a 12V 7.2Ah battery which I thought I should get one as a spare. So finally after all this, I had a shopping list for various batteries. I contacted a local supplier for CSB batteries, and was able after a short email exchange, got a quotation and placed the order.

The batteries arrived on Thursday, just before the Easter holidays began, so was an opportune time to perform the replacements. In general, the APC UPS’s are relatively easy to open and replace batteries – except the BX1400U. The front cover needed to be unclipped, and under that was three screws that needed to be removed, then the back cover after disconnecting the battery safety, had four screws. Then the case had to be cracked open – generally by using a couple of big screwdrivers to pry open the sides.

I forgot to take photos, but did find someone on Youtube that had done this, and was able to follow the steps carefully – since in my UPS, there were cables to the internal transformer that were clipped to the case. If I had followed the steps literally, I might have damaged that particular cable. The BX1400U needed two 12V 9Ah batteries that are taped together and connected in series. After installing those, I reassembled the case, and plugged the battery safety plug back in. There was a sound of a spark, when I did that, but it can be quite normal when connecting battery leads and this UPS isolates the battery by using a safety plug which is like a bladed fuse.

After doing this for each of the UPS’s – I then connected the UPS’s to the power board, turned them on left them for a few days while I monitor them. The battery failure light should now be off, and it gives sufficient time to fully charge the internal batteries before I disconnect them. Ideally when I turn off the power to the UPS, they each should beep to alert me to a power outage, but the UPS should stay turned on – which they did.

So it appears that my battery replacement has restored these UPS’s to working order. We will find out in the next power outage, I am sure. If you are not using a UPS to protect your NAS, you might want to consider doing this, as each time there is a power failure, your NAS may suffer some slight data corruption, which can get worse each time it happens.

[P.S. If the APC UPS has failed, and even replacing batteries hasn’t allowed proper operation – it is likely that the UPS has had an electronic failure. APC does have a trade in service that gives you 25% off the purchase of a new APC UPS. Also they did have a repair option for out-of-warranty UPS’s which I had used in the past for a BP1400 that protects my main servers, but I don’t seem to find that now.]

Replace.IT – Power adapter for CCTV cameras (Follow-up)

This is a follow-up on my previous article about the failed power adapter for my CCTV Camera system. I mentioned that I had replaced the failed power adapter – the one that had a burnt transformer, which was not able to be repaired. The power adapter I plugged in also had a fault which appears to be a failed output filter capacitor.

This filter capacitor is at the output of a 12V regulator, so should have removed a lot of the mains ripple voltage. It shows up as a moving line or bar in the video output from the camera.

The bar can change in height, but will move around. I had ordered a replacement power adapter which arrived in the post just a short time ago. As the ladder was already in place, it was a simple matter of swapping out my power adapter with the new one. I had ordered the power adapter with the right plug and center pin positive polarity, so it was a simple swap.

After this was done, the change in the video was quite obvious, no more lines. The picture quality isn’t great as you can see – as the cameras are analog versions, which are many years old, but will suffice for now. It looks like the time is wrong in my recorder – I will have to fix that up. That’s all for now.
Repair.IT or Replace.IT – Power adapter for CCTV cameras

It is a Sunday again, and another wet one. Actually it has been raining frequently for almost the past week and our front lawn is so water-logged that it is almost resembling a swimming pool, albeit for frogs. As I write this article, I hear that evacuation warnings are out in many areas of the state, and Sydney’s main weir – Warragamba Dam – has started spilling over, due to over-capacity. That is going to exacerbate the current flooding due to this storm.

Anyway, today’s task was to look at the CCTV camera system which had stopped working some time ago. There was no video coming from the cameras to the video recorder, so I suppose the problem is in the roof. The CCTV cameras are powered by a power adapter that connects to two cameras at a time, through the use of a splitter. This power adapter is located near the manhole in the garage. As the manhole is quite high, I needed an extension ladder to get to it. Since we don’t use such a ladder all the time, we swap the ladder between my sister and I as needed. Anyway, that is another story.

Since the ladder was now here, I placed it up through the manhole and went up to see what was going on. The power adapter for the cameras was in the roof cavity and when I saw it, I knew that it was unlikely to be repairable. I brought it down, and scrummaged around in the my spares box for a similar power adapter and plugged that one in. The cameras were now working but for a horizontal stripe, which moves up and down – meaning that there is some ripple in the power adapter DC output that was getting into the video. But at least the cameras were working now.

It wasn’t my camera taking this picture that was wonky, but the power adapter itself was misshapen. It should be a rectangular object, but it seemed to have been exposed to a lot of heat. We have had some hot days during our summer, but there was also a bulge at the top.

This bulge isn’t normal, but may be indicative of why the power adapter had failed. I decided to open it up and see what had caused it to fail like this. The plastic was brittle, an indication of either old age or heat. As the power adapter wasn’t more than a few years old, I suspected that old age would not be a factor, so heat must be.

After using a rubber mallet, a couple of large screwdrivers, and a pair of pliers, the case started breaking up (or splintering actually) into small pieces and finally I had it open.

That burn mark stood out, and it was where the case was bulged out. This is quite unusual, so I turned it around to take a better look.

One of the primary leads had burnt off from the transformer, so I surmise that the primary side of the transformer had developed a short circuit where the lead was connected, and caused it to overheat. The exhaust gases from the short circuit would have ballooned the case out, and eventually got hot enough to cause the case to shrink and become misshapen. This would have continued until the lead melted or burnt off from the transformer.

Fortunately, it didn’t catch on fire. Anyway, this burnt transformer confirms my initial suspicion that this power adapter is a write-off therefore repair is out of the question. I don’t really want to take the transformer apart by removing the laminations, remove the insulation, then remove and rewind the primary winding, add new insulation and reinstall the laminations – which is what it take to repair this transformer. Of course, I don’t need a CCTV camera system to tell me how miserable it looks outside on a day like this, but at least I am getting some video that tells me that the cameras need cleaning. Over time, condensation can build up on the inside of the housing, which makes the view appear foggy. I think I will have to wait for the rain to stop before I try getting to the cameras.

I had a look on eBay for replacement power adapters. It appears that 12V 1A power adapters are much cheaper than 12V 300mA power adapters, so will order a 12V 1A version. I guess I will live with the horizontal stripes until the replacement power adapter arrives. Maybe it is time to install a new NVR camera system than the current analog CCTV system.

Replace.IT – Left and Right click switches on Logitech G700 Wireless Mouse

I was doing some cleanup in my house late last year and I came across a computer mouse that belonged to my son. It was a Logitech G700 Wireless Mouse that used a rechargeable NiMH battery. I asked him about it and he said that it was faulty – the left click would sometimes not click and/or would release even when pressed. He had replaced it with another mouse, so if I wanted to use it – I was welcome to it. As luck would have it, my Logitech wired mouse was also having some problems. Every so often, I would hear the beep tones that my mouse had disconnected on the USB and then would reconnect a moment later. It was strange as I could still see the mouse tracking led staying lit while this disconnect happened.

I tried the G700 mouse, and it had a really good feel. Yes, I could see that the left mouse button definitely had a problem. I looked on Google and could easily find people who had the exact same problem. As my son is an avid gamer, the left mouse button most likely had experienced a full life, such that the internal springs were weakened, which leads to this problem.

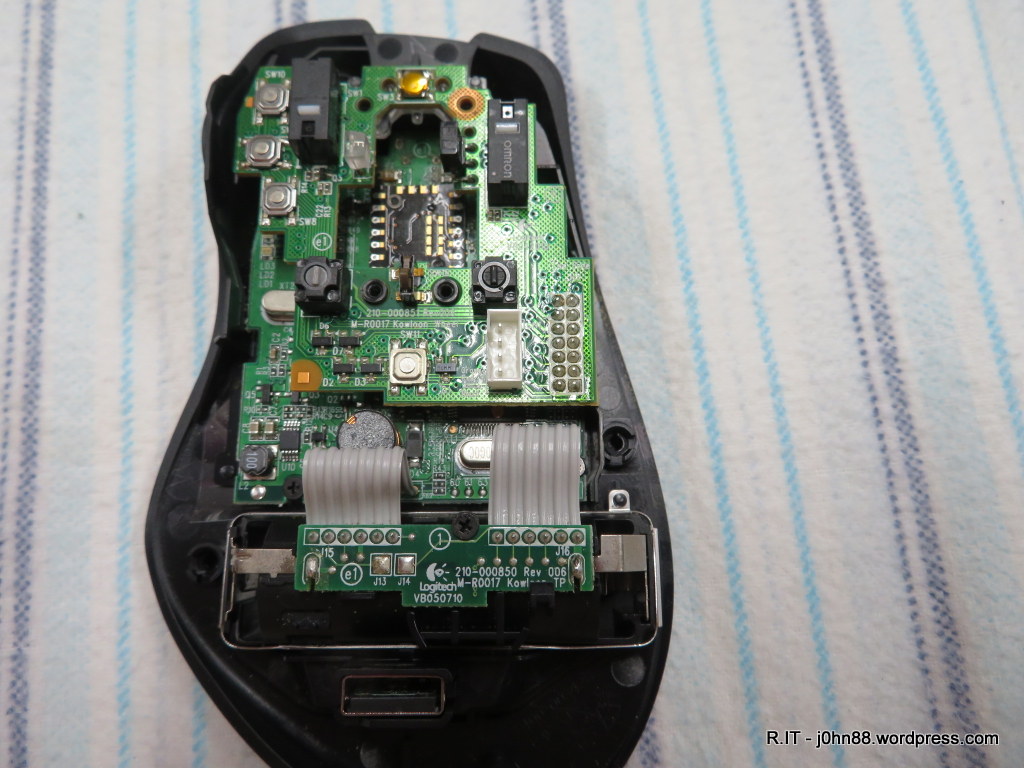
To open the mouse, I needed to remove the teflon glide pads to access the five tiny screws. It opens up easily and I could read the switch model numbers. I saw a D2FC-F-7N(10M) which was made by Omron. The 10M is probably the quality – 10 million operations. I checked on eBay and found a lot of people selling the D2FC-F-7N but no designator. Anyway, I wanted to replace both switches anyway, and the eBay pricing is such that the price for 10 is not much more than for 2, so I ordered 10 of them.

As expected, the delivery time from China is varied, and they arrived a week ago. I had a spare couple of hours this evening, so decided to get the job done. I opened the mouse again, and removed the mouse wheel, and then the metal bracket and plastic fittings that had held the mouse wheel in place.

As is my practice, I place the screws and bits and pieces in a sort of order, so that I can put these parts back together in the proper order.

This top board needs to be removed – so that I can get to the switches – those black rectangular blocks with the white switch activator on the top. In order to do this, I will have to desolder 14 pins that can be seen at the bottom right of the top board. Let’s find out if my desoldering station is still working.

Yes, success – after some minutes, the top board was loose.

Here it is a closeup, then let’s see the bottom of the board.

Those large pads should be an easy job for my desoldering station.

Sure enough, the switches are off, and I now put the new switches nearby with the correct orientation, ready to go in.

Then soldering the switches were another easy job. Next step is to put the top board back on.

When the top board is in place, I will solder the 14 pins.

Ok – after an inspection through a magnifying glass, I think the job is done. Well, almost.

The mouse wheel supports are fitted now. You might see two tiny springs at the top, next to the black screws.

The mouse wheel is back in place. Now – where did I put the top cover?

There it is! I just need to connect that orange plug into the white socket, then close the cover, install the screws, and put the teflon glide pads back on – and the repair job will be completed.

The acid test – does it work? Plug the wireless mouse receiver into my laptop – put the battery back in, and switch the mouse on. Yes, it works – both buttons work as they should. Some of you might ask – if it was only the left mouse button that was failing, why replace both? The answer is that if one switch is failing, the other is not far behind. Another answer is that I have gone to the trouble of opening it up, so while I am there, I should replace the other switch at the same time. Agree? It is getting late, so bedtime for me – bye for now.

Repair.IT – Kleenmaid TO500X Oven door hinges replacement

The other day, my son heard a cracking sound when he opened the oven door, and it wouldn’t close properly anymore.  It seems that the oven door hinges spring wasn’t working to hold the weight of the door and when closed, the door would sit ajar.

On further inspection, the pin that would connect to the springs was broken, so there was no choice except to remove the door from the oven so that I could have a better look at the problem.  Fortunately the manual showed how to remove the door, which in this case was very easy, lift it, and then pull outwards while tilting back towards the oven.  If the springs were working, we would have to normally open the door, then engage the hinge latch which would allow the door hinge to stay in the open position for the door to be removed.

I found that the part number was GN166667 and after a quick check on eBay found a supplier that had a pair of these original hinges for around AU$64 after an eBay discount was applied.  If I order this from the spare parts warehouse, I would be paying AU$55 plus delivery for each hinge, so I ordered from eBay and saved a bit of money.

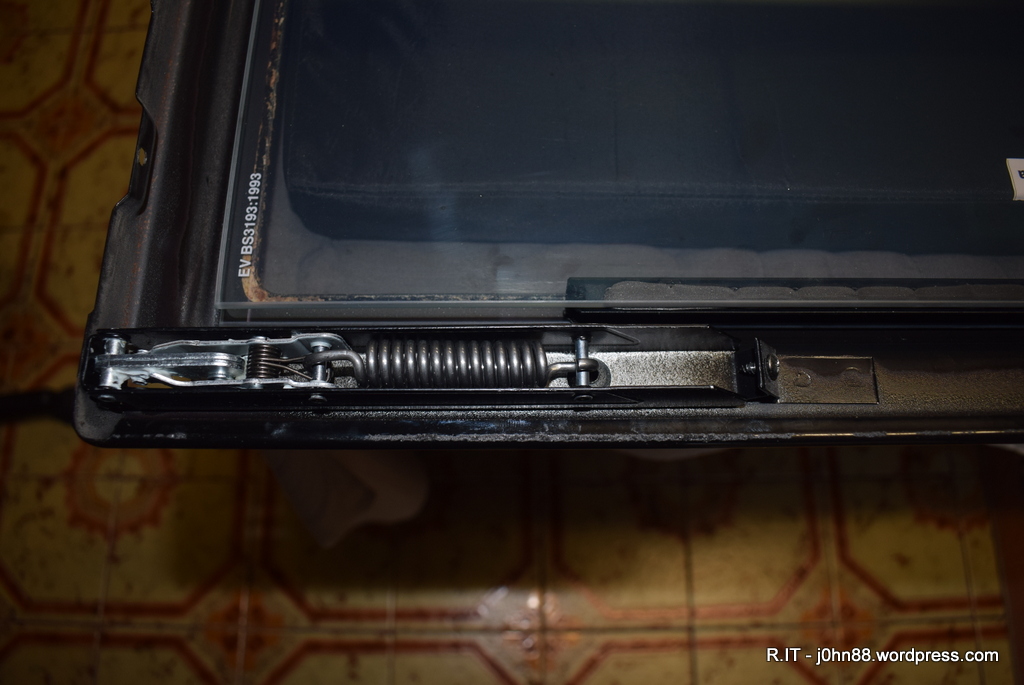
On my Kleenmaid oven door, there are two screws that hold the inner door from the outer glass door.  Also around the top and sides of the inner door is a sealant that has also deteriorated.  I found by at Bunnings, a Sika 300g Black Sikaseal Appliance Sealant for AU$14.78 that has a high temperature resistance, up to 250°C which appears to be the right sealant for the job.

Next step was scraping off as much of the old sealant as I could – a razor blade would have been handy, but who has one of these nowadays with electric shavers.

DSC_1684

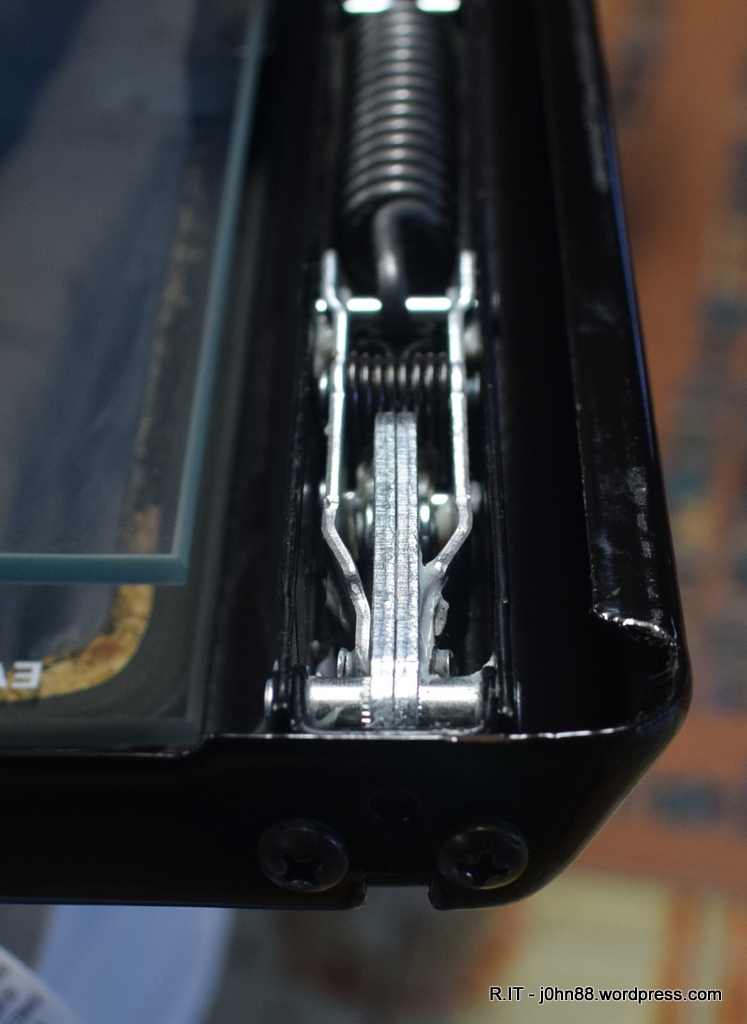
A few days after I had ordered the hinges, they arrived.  The hinges are held to the inner door by three screws, two on the base, and one screw that is at the top of the hinge, only accessible when the inner door has been separated from the outer door.

DSC_1679

DSC_1680

The inner door, by the way had two sheets of glass – one that is facing the inside of the oven.  This means that the door assembly has three sheets of glass, so good insulation of preventing the heat from radiating through the door.

DSC_1678-001

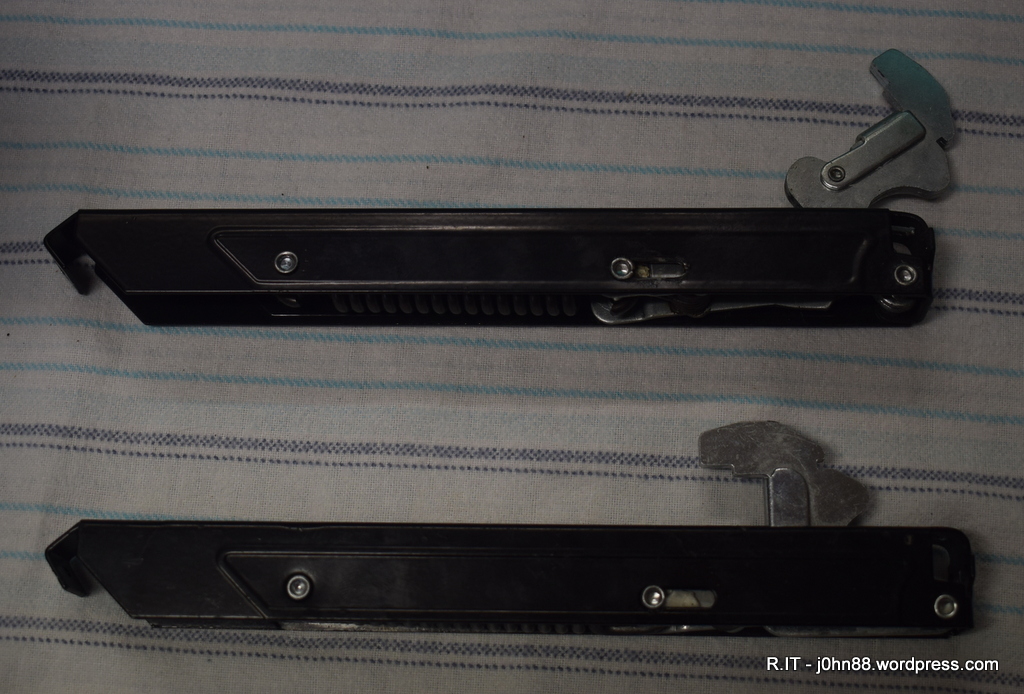
Here is a picture of the two hinges after removing from the door.  The top one should not be able to stay like that since the spring should be pulling back, except of course it is broken.  From recollection, a while ago, the door didn’t seem to be closing properly which could mean that one hinge had already failed at that time.  Also I didn’t find any broken bits of the pin, so no idea how it broke unless it had just kept wearing away, due to the door being opened and eventually there was not much left of it.  The oven is 12 years old – and I have worked on this in the past, with various electrical issues, but this was the first mechanical issue.

After the replacement hinges were installed, I then applied the sealant – it was difficult to squeeze the trigger and move the tip at the same time, to get the sealant into a good straight line with the correct thickness.  Of course, if I did this over and over again, like the appliance repairers do, I could then do a good job each time, but for my first, I did an adequate job.  Once the sealant was on, the inner door was mounted and screwed up.

I did have a bit of sealant squeeze out, so used a cloth to wipe around the edge of the inner door, and got most of the excess sealant off and cleaned up well enough.  The sealant generally takes 24 hours to cure, so it was left in the garage to do this (also the sealant smells, and wife doesn’t take kindly to stinky things in the kitchen).

The next day, I wipe the door over, since the garage is dusty – then needed to extend the hinges and lock them in the open position.  I used an adjustable spanner, to hold the tip of the hinge, then cranked it open – then moved the latch, and released the hinge.  Both hinges were done eventually.  I did slip with the spanner a couple of times, without breaking my fingers, but one was a little sore afterwards.

Capture

This picture shows the door removal and installation process – showing the movable lock that I call the latch.

Then it was a matter of getting the hinges into the slots in the oven frame, then letting it settle downwards and latch, then open the door fully, release the latches then the door can close – actually they closed very well – looked better than new, no gaps at all.

Now I have most of a tube of appliance sealant left over, who needs some?  By the way, if I got an appliance repairer to do this job, I wouldn’t need the sealant since they would have it, but it would cost AU$250 for the callout, and then plus parts and whatever additional labour is needed – so likely to be around AU$400 or so, but this has cost me AU$75 to do it myself.  There it is – another repair done, and the wife is happy!

Replace.IT – Power plug on workshop light

Sometime early this year, I was given a workshop fluorescent light which I thought would be good to improve lighting for my metal lathe in my garage workshop.  The light hangs from a couple of hooks that I placed on the support rail that my garage door rolls on.

Anyway, this is not really about the light as it could apply to any appliance.  I noted at the time that the power cord had a plug on the end which did not have the cord grip nut which clamps the cord to the plug so that pulling on the cord does not pull the wires out of the plug.  I had bought a replacement Deta 10A Grey Plug Top from the local Bunnings to replace it at a time of my leisure.

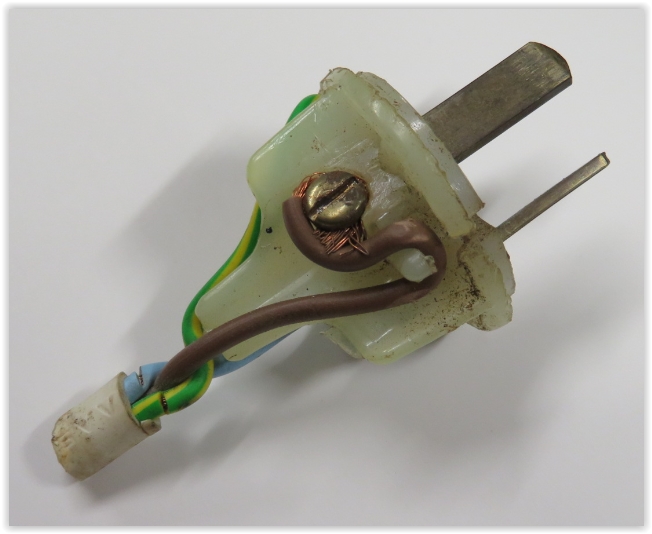
That time happened this afternoon, so on removing the plug cover – I noticed something which unfortunately is all too common.  The wires had been damaged, so it was a good thing that I was replacing it.

Screen Shot 07-23-19 at 07.31 PM

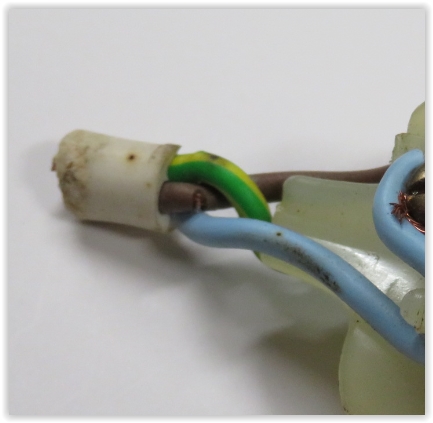
The insulation on theground and neutral wire appeared to have been cut.

Screen Shot 07-23-19 at 07.31 PM 001

Turning it over (although a bit out of focus in this photo – I should retake the photo but my camera battery needed charging), shows that similarly, the active wire insulation is also damaged.  This happens if a Stanley knife or common box cutter is used to cut the outside insulation which if cut too deep ends up cutting into the wire insulation, thereby exposing the conductors.

I cut the end off the cord so that I could show you what it looked like, then fitted the Deta replacement plug wired according to the instructions and firmly fitted with the cord grip nut.  The motto is – if possible, always check appliances that you are given in case they have been modified – or have someone do this for you.


Replace.IT – Upper fan for Antec 1100 computer case

I am a little down with the flu, so sitting at home, it is always a good idea to do some writing, or is it blogging – to clear the backlog of R.IT articles.  The Antec 1100 is a great computer case, since it has lots of fans, and space for hard disks, and lots of expansion slots.  That’s a lot of lots – right.  It had started its life as a case from my scrypt (think – cryptocurrency) mining computer, and was eventually repurposed for my VMware ESXi server.

My ESXi server needed six hard disk drives so this case was ideal for it. After a couple of years of operation, I started hearing a bit of rattling sounds from the server which would come and go.  Eventually I noticed after removing the side panel, and by looking up, that the top exhaust fan, was sometimes stopping and if it would spin, would spin with a wobble or slight rattle.  This was the cause of the sound.

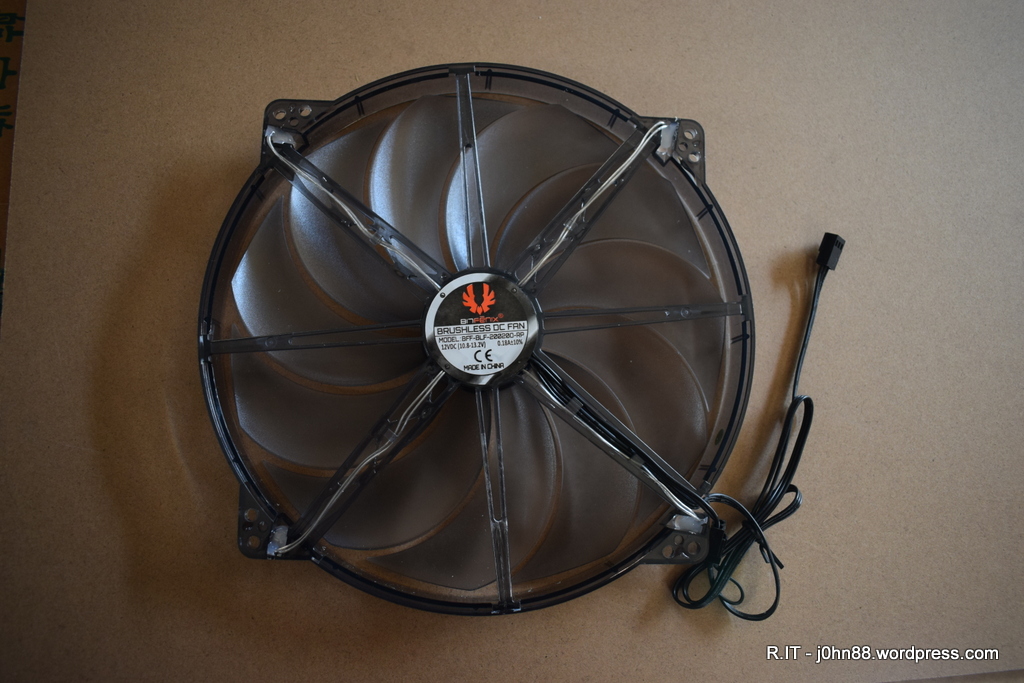
The fan was a 22cm fan, but it was a slightly longer shape – and checking on some forums found that others had similar problems, but had replaced the fan with a standard 22cm computer case fan. I found a Bitfenix 22cm case fan from a local supplier who had it in stock, so bought that one.

DSC_0357

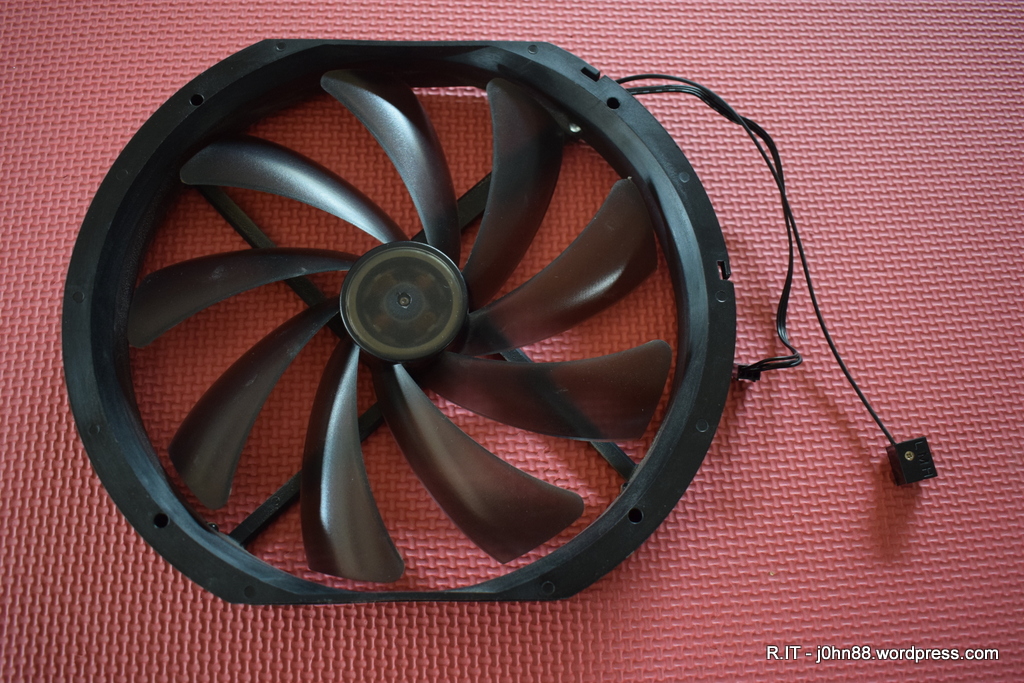
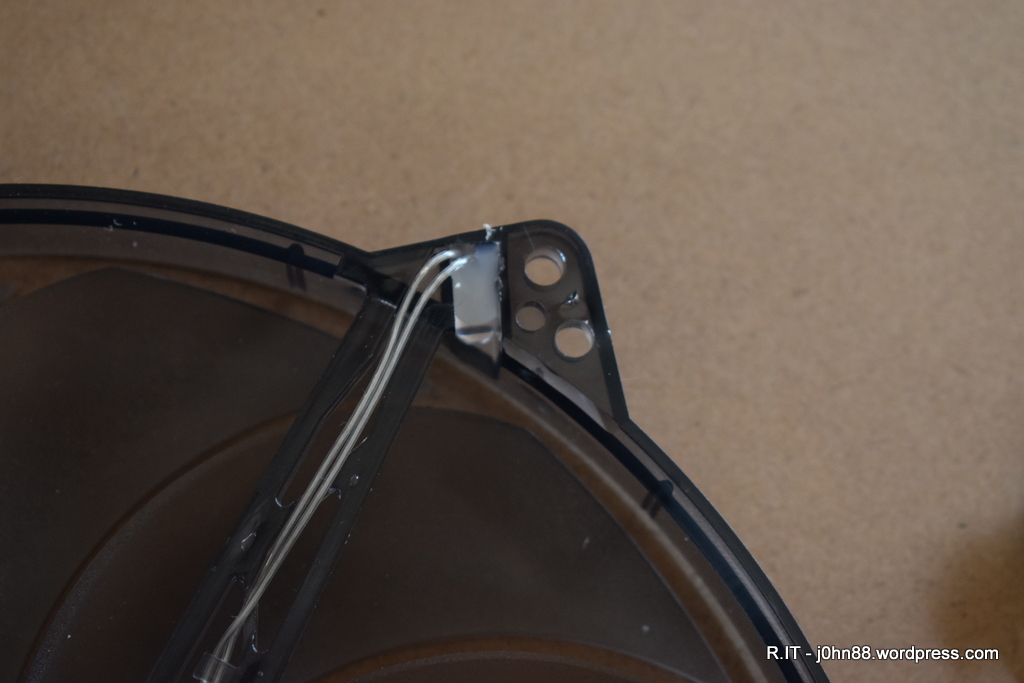
Here is the original fan from the Antec 1100 case. The mounting holes are not as standard as I thought.  When I compared it with the Bitfenix fan, I found that the Bitfenix followed the standard mounting radius and that the Antec fan, had a slightly smaller radius.  After some consideration, I noticed that there were other spots where mounting holes could be available, so used a 4.5mm drill to enlarge the holes adjacent to the standard mounting holes.  It is a bit hard to describe, so here are a few photos.

DSC_0342

This shows the new holes nearby, and the next one is a closeup to clearly show the new mounting hole that is away from the corner.

DSC_0343

So, after this, it should be a small matter to reinstall the fan, however since the server was still running, I decided it would be best to shut it down to make the job easier.  I don’t want to accidentally drop a metal screw onto the motherboard and cause a failure to occur.  Another Replace.IT done.  Now what should I write about next, maybe something of an electronic nature – except those haven’t come up very much lately.