

Recap: Back in October 2018, I wrote about the repair of this Samsung CLX-3305FW printer. Fast forward about a year – I was printing a long document that I needed for studying my CompTIA Security+ course, and partway through, the printer stopped feeding paper.
I went and checked the paper feed roller – just like last time – but this time, it didn’t work. In the meantime, I needed to finish the printing, so bought a reasonably inexpensive Brother MFC-L2730DW Mono Laser Multi-Function printer, which could also do automatic double sided printing, which meant that I could save on paper as well.
The Samsung was relegated to the garage where it was stored, until fast forward to Feb 2020. Just a week ago, I decided that I found a requirement to print something in colour. So, then the Samsung came out of the garage, and I decided to do further troubleshooting to see if I might be able to repair it this time.
This meant removing the paper tray, so that I could see the paper feed roller in action. There is an interlock switch, so I opened the rear cover door, put something into the tray sensing switch to indicate that the paper tray was installed, then another to set another switch to think that the rear cover door was closed.
After powering on, I selected the menu to perform a network configuration report, which should print out the network settings. By using a torch shining into the area that the paper tray would normally sit, I waited for the paper feed roller to rotate – after a number of clicks and attempts to feed paper, the printer stopped with an error – Paper Jam, and of course, no movement of the paper feed roller.
This would explain why adjusting the paper feed roller did not work this time. After an extensive google search, where 95% of the responses was to replace the paper feed roller, I found an article that mentioned something about a paper feed solenoid. A check of the service manual, showed that this device actually did exist, buried in the internals of the frame base-paper path mechanism. But no troubleshooting diagrams in the manual involved the solenoid.
After finding a Youtube video from someone cutting a piece of foam rubber, and attaching to the solenoid – I thought, why not. I had nothing to lose by trying this. So the steps I followed was:
- Remove all the toner cartridges and place them somewhere safe
- Open the rear cover door
- Remove 4 screws and remove the rear cover
- Release and remove the right cover
- Release and remove the left cover
- Remove 4 screws that secure a printed circuit board, and partially remove the connectors and the board
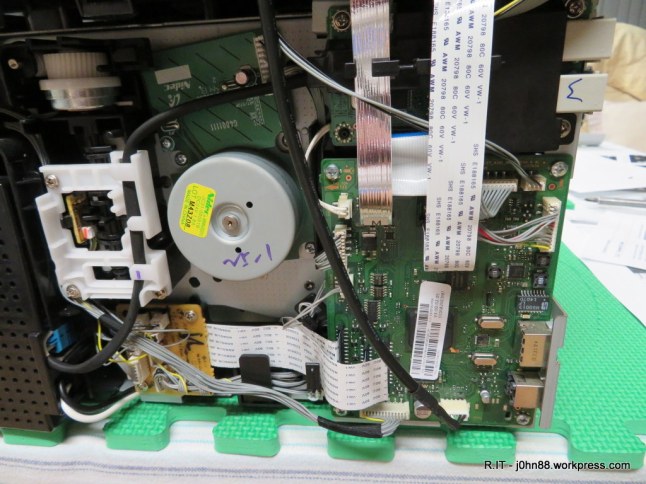
- Remove some screws and remove a gear assembly – actually this might not have been necessary, because maybe only one or two screws were needed, but I had done this anyway.

- 6 screws removed, and then the frame base-paper path assembly could almost be removed.
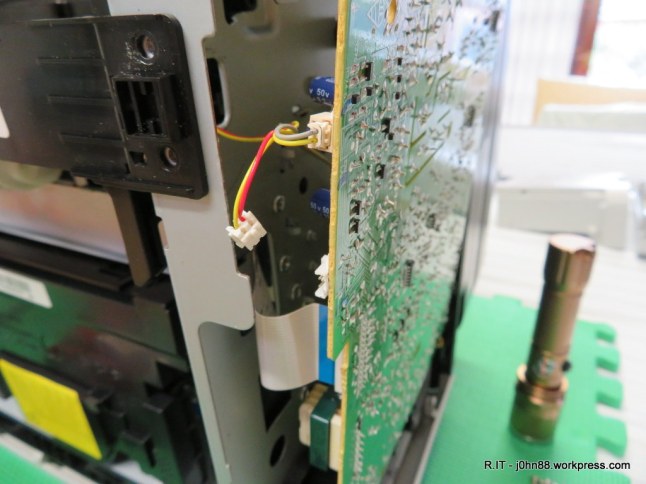
- 3 cable connectors on the left, when viewed from the back and 1 connector on the right needed to be released so that they could be threaded through the metal chassis, before the aforementioned assembly could be completely removed.
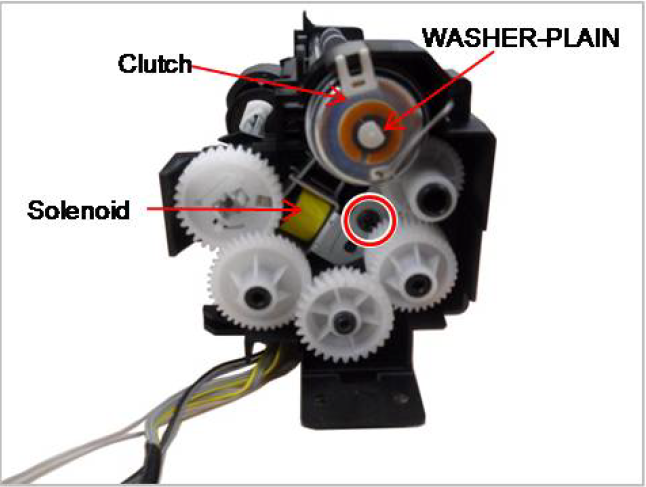
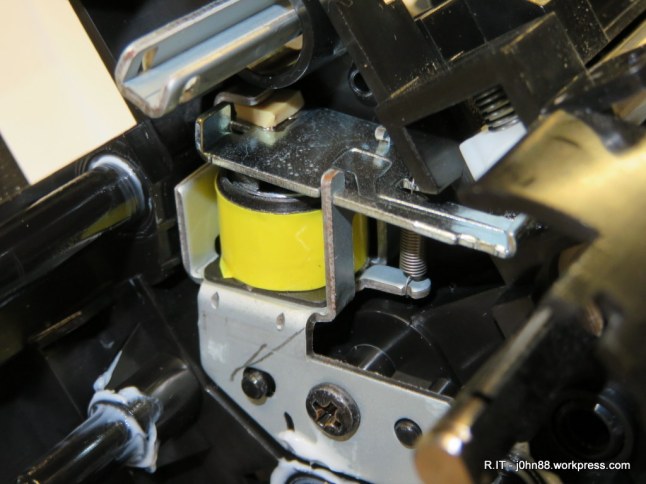
The picture above is viewing the side of the assembly that has the solenoid on it – as pictured in the service manual. After removing the gears as needed, the solenoid was released and could be looked at. Sure enough, there was a black pad, that seems to have compressed almost completely over time. The printer was bought mid-2014 so after 5 years of only moderate use, this black pad had deteriorated.
The reasoning behind this is that the pad should have been probably 1.2mm thick, so that the clapper plate would be within range of the solenoid operation. But being further away, meant that the solenoid wasn’t strong enough to pull this plate in, which would then release the gear that allowed the paper feed roller to rotate.
I remembered that I had some natural rubber sheet, previously bought to repair a vacuum pump, so got a piece of it out and cut it to similar size and after scraping off the original black foam, it had some sticky stuff left on the plate that my replacement appeared to fasten firmly.

I added a dab of plastic glue, just in case, but normally the solenoid retainer would keep this in place. Next is a photo of the solenoid re-installed, but without the gears.
Then finally, all the gears back on, together with the paper feed motor.
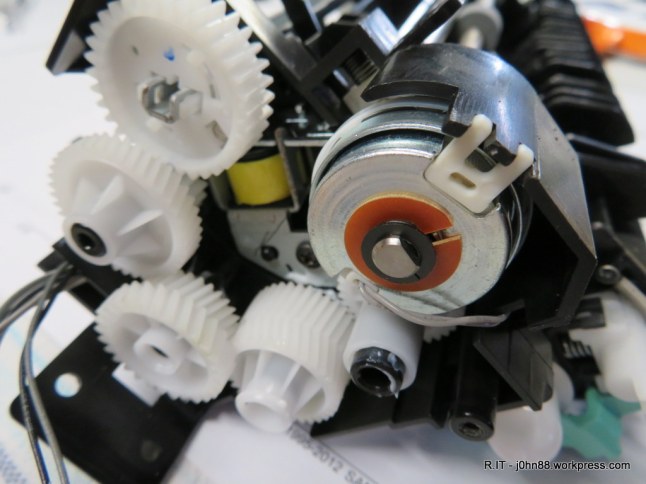
You can just see that solenoid buried inside. Then the chore of re-installing everything back in, keeping to the order that things were removed, then putting the covers back on and count how many screws remain – none, great, so everything is back in place.
Occasionally during repairs like this, there is the extra screw left over, which had been removed at one stage, and when memory doesn’t work to put it back, so taking lots of photos before and during disassembly helps, to see if there is a missing screw. My extra screw collection is quite small – I have heard of engineers accumulating large numbers of these extra screws, but that is another story.
So did the printer work, I can see you asking. Yes, definitely. On power-up, a page was fed and ejected, due to the paper feed gears being in a position to rotate. Next up, print the network configuration report – the output was very crisp, meaning that the printer was working properly. Yes, I did also remember to install the toner cartridges before powering up.
The big test was printing a colour certificate. I had only recently in the past week passed my 210-255 exam for the Cisco CCNA CyberOps certification, so just wanted to print the certificate while the original was being processed for shipping. Success again, the certificate printed out with only a slight discolourationin the pale blue background – but hopefully that should clear up once the printer gets a few more printing jobs done.
Now since I have also passed my CompTIA Security+ and CompTIA CySA+ certifications, I should try printing the CompTIA Security Analytics Professional certificate which I get by completing those two CompTIA certifications. Now I will concentrate on studying for the CompTIA PenTest+ certification.
